[따배도] 4-2. Container 만들기 (실습)
( 참고 : 따배도 https://www.youtube.com/watch?v=NLUugLQ8unM&list=PLApuRlvrZKogb78kKq1wRvrjg1VMwYrvi )
Contents
- Nodejs application container 만들기
- Ubuntu 기반의 web server container 만들기
- Container 배포하기
Q1. Nodejs application container 만들기
mkdir hellojs
cd hellojs/
cat > hello.js
소스코드 hello.js를 작성한다
const http = require('http');
const os = require('os');
console.log('Test server starting...');

var handler = function(request, response){
	console.log('Received request from '+ request.connection.remoteAddress):
	response.writeHead(200);
	response.end('Container Hostname: ' + os.hostname() + '\n');
};

var www = http.createServer(handler);
www.listen(8080);
도커파일 dockerfile를 아래와 같이 생성한다.
vi dockerfile
FROM node:12
COPY hello.js /
CMD ["node","/hello.js"]
# 작은따옴표 절대안됨!
FROM node:12: 운영환경을 제공해주는 base imageCOPY hello.js: 컨테이너의 최상위 directory로 소스코드를 복사한다CMD ["node","/hello.js"]: command를 실행해준다- node라는 명령을 가지고, /hello.js파일을 실행한다
소스코드 ( hello.js ) 와 도커 파일 ( dockerfile ) 을 확인해보자.
cat hello.js
cat dockerfile
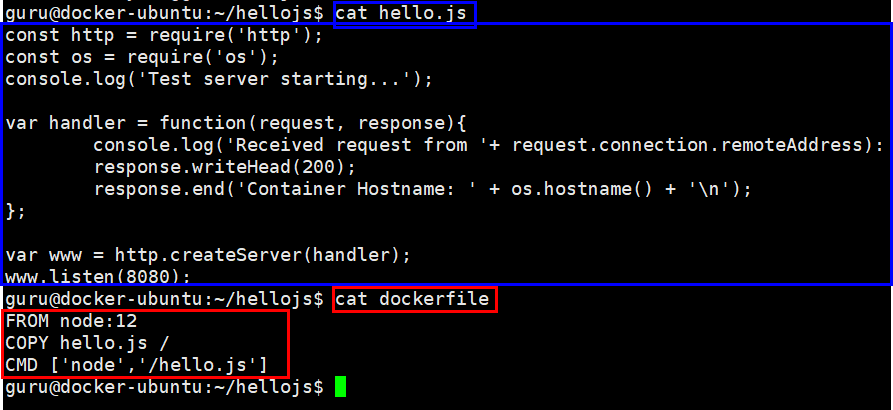
이 두 파일을 바탕으로, container image를 build한다.
-
hellojs:latest: container 이름 : tag -
마지막의
'.': 현재 directory 안에 있는 파일을 기준으로!
docker build -t hellojs:latest .
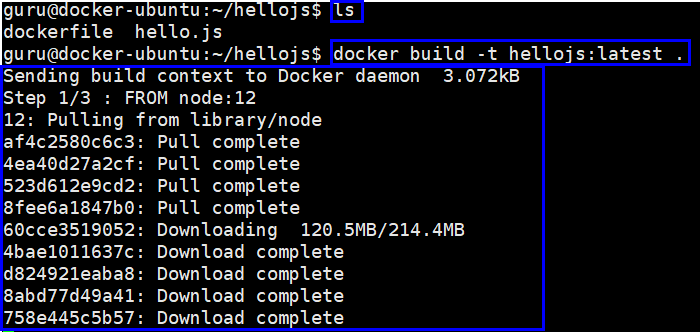
-
3줄이 TOP DOWN 방식으로 차례대로 실행됨을 알 수 있다.
( FROM - COPY - CMD 순으로 )
-
3개의 image가 만들어진 것이다
방금 만든 docker image가 잘 생성 되었는지 확인해보자.
docker images

Q2. Ubuntu 기반의 web server container 만들기
이번엔 base image를 ubuntu로 할 것이다.
cd ..
mkdir webserver
cd webserver/
도커파일 dockerfile를 아래와 같이 생성한다.
vi Dockerfile
FROM ubuntu:18.04
LABEL maintainer="Seunghan Lee <seunghan96@naver.com>"
# install apache
RUN apt-get update \
	&& apt-get install -y apache2
RUN echo "TEST WEB" > /var/www/html/index.html
EXPOSE 80
#CMD ['/usr/sbin/apache2ctl','-DFOREGROUND'] 소따옴표 안됨!
CMD ["/usr/sbin/apache2ctl","-DFOREGROUND"]
-
AA
&&BB : AA가 성공하면, BB도 이어서 실행하라! -
2개의 image 생성 ( RUN을 2번 실행하기 때문에 )
RUN apt-get updat RUN apt-get install -y apache2 -
1개의 image 생성
RUN apt-get update \ && apt-get install -y apache2 -
RUN echo "TEST WEB" > /var/www/html/index.html- 서비스하고 싶은 웹 html문서를 저장한다
-
EXPOSE 80: 80번 포트 -
CMD ['/usr/sbin/apache2ctl','-DFOREGROUND']- container 실행시, web server가 자동으로 동작하도록!
위의 dockerfile를 사용하여 container를 build한다.
docker build -t webserver:v1 .
- 총 6개의 line이 순차적으로 실행됨을 알 수 있다.
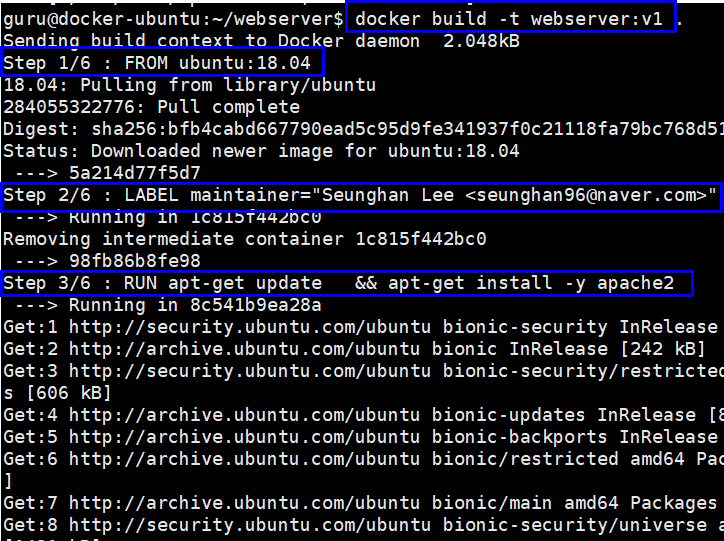
방금 만든 docker image가 잘 생성 되었는지 확인해보자.
docker images

docker run -d -p 80:80 --name web webserver:v1
docker ps
curl localhost:80

- 잘 동작함을 확인할 수 있다
docker rm -f web
-
running 중인 컨테이너를 삭제한다
( docker image를 삭제한 것은 아니다 )
Q3. Container 배포하기
이제 만든 image를 docker hub 계정에 upload해서 누구나 다운로드 받을수 있도록 할 것이다.
docker login
#docker images
docker tag webserver:v1 seunghan96/webserver:v1
docker tag hellojs:latest seunghan96/hellojs:latest

docker images
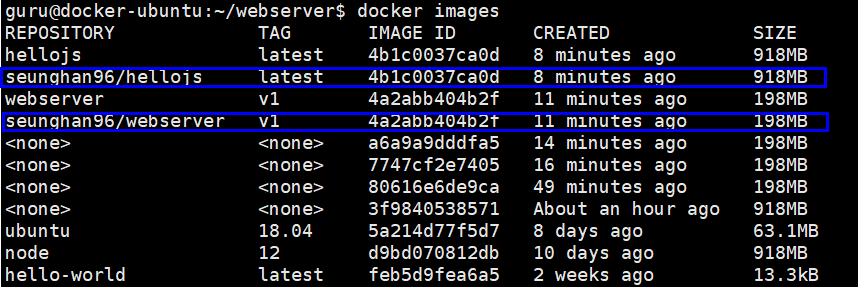
- 앞애 내 계정 (seunghan96)이 붙은 새로운 image가 생성된 것을 확인할 수 있다
- 하지만 IMAGE ID를 보면, 이는 사실상 동일하다는 것을 알 수 있다
docker push seunghan96/webserver:v1
docker push seunghan96/hellojs:latest

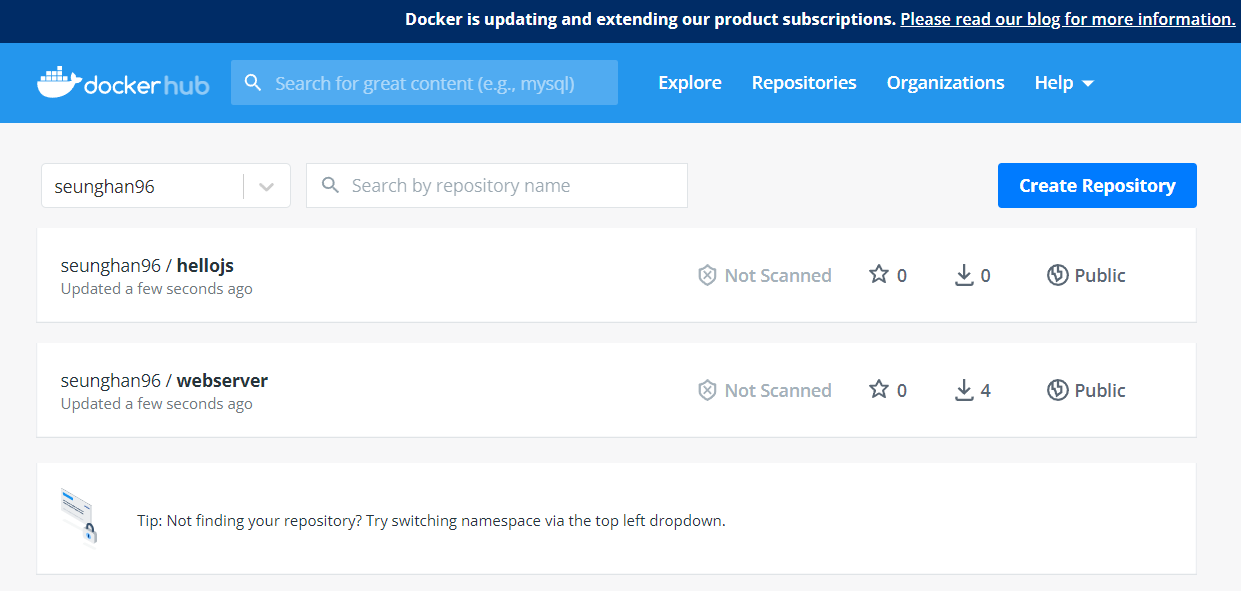
배포 성공!
