
Mlflow 2. MLflow 프로젝트
Contents
- sklearn 설치하기
- 경로 이동
MLProjecttrain.py- 프로젝트 실행 :
mlflow run - 결과물 확인
- 웹 대시보드
앞선 포스트에서와 다르게, 이번에는 실제 ML 모델에 mlflow를 적용해볼 것이다.
사용하는 예시 폴더는 앞선 포스트와 동일하다.
1. Sklearn 설치하기
$ pip install sklearn
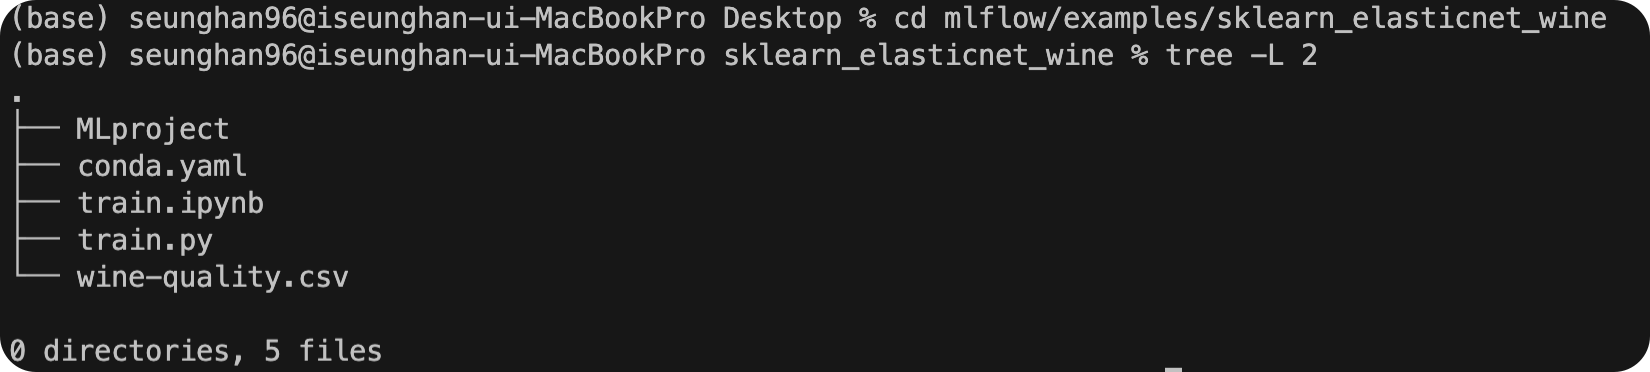
2. 경로 이동
$ cd mlflow/examples/sklearn_elasticnet_wine
해당 경로 하에, 어떠한 파일이 있는지 tree 구조로 확인해보자.
3. MLproject
위 경로에 있는 MLproject 를 확인해보면, 아래와 같다.
# MLProject

name: tutorial

conda_env: conda.yaml

entry_points:
  main:
    parameters:
      alpha: {type: float, default: 0.5}
      l1_ratio: {type: float, default: 0.1}
    command: "python train.py {alpha} {l1_ratio}"
한 줄로 요약하면, 프로젝트 관련 각종 설정 파일이라고 볼 수 있다.
- name : 프로젝트 이름
- conda_env : 실행할 conda환경 관련 정보들이 담겨있는 파일
- entry_point : 터미널에서 실행할 커맨드 관련 정보들
4. train.py
이름에서도 알 수 있듯, ML 모델 관련 train 파일이다.
# train.py

import os
import warnings
import sys

import pandas as pd
import numpy as np
from sklearn.metrics import mean_squared_error, mean_absolute_error, r2_score
from sklearn.model_selection import train_test_split
from sklearn.linear_model import ElasticNet
from urllib.parse import urlparse
import mlflow
import mlflow.sklearn

import logging

logging.basicConfig(level=logging.WARN)
logger = logging.getLogger(__name__)


def eval_metrics(actual, pred):
    rmse = np.sqrt(mean_squared_error(actual, pred))
    mae = mean_absolute_error(actual, pred)
    r2 = r2_score(actual, pred)
    return rmse, mae, r2


if __name__ == "__main__":
    warnings.filterwarnings("ignore")
    np.random.seed(40)

    # Read the wine-quality csv file from the URL
    csv_url = (
        "http://archive.ics.uci.edu/ml/machine-learning-databases/wine-quality/winequality-red.csv"
    )
    try:
        data = pd.read_csv(csv_url, sep=";")
    except Exception as e:
        logger.exception(
            "Unable to download training & test CSV, check your internet connection. Error: %s", e
        )

    # Split the data into training and test sets. (0.75, 0.25) split.
    train, test = train_test_split(data)

    # The predicted column is "quality" which is a scalar from [3, 9]
    train_x = train.drop(["quality"], axis=1)
    test_x = test.drop(["quality"], axis=1)
    train_y = train[["quality"]]
    test_y = test[["quality"]]

    alpha = float(sys.argv[1]) if len(sys.argv) > 1 else 0.5
    l1_ratio = float(sys.argv[2]) if len(sys.argv) > 2 else 0.5

    with mlflow.start_run():
        lr = ElasticNet(alpha=alpha, l1_ratio=l1_ratio, random_state=42)
        lr.fit(train_x, train_y)

        predicted_qualities = lr.predict(test_x)

        (rmse, mae, r2) = eval_metrics(test_y, predicted_qualities)

        print("Elasticnet model (alpha=%f, l1_ratio=%f):" % (alpha, l1_ratio))
        print("  RMSE: %s" % rmse)
        print("  MAE: %s" % mae)
        print("  R2: %s" % r2)

        mlflow.log_param("alpha", alpha)
        mlflow.log_param("l1_ratio", l1_ratio)
        mlflow.log_metric("rmse", rmse)
        mlflow.log_metric("r2", r2)
        mlflow.log_metric("mae", mae)

        tracking_url_type_store = urlparse(mlflow.get_tracking_uri()).scheme

        # Model registry does not work with file store
        if tracking_url_type_store != "file":

            # Register the model
            # There are other ways to use the Model Registry, which depends on the use case,
            # please refer to the doc for more information:
            # https://mlflow.org/docs/latest/model-registry.html#api-workflow
            mlflow.sklearn.log_model(lr, "model", registered_model_name="ElasticnetWineModel")
        else:
            mlflow.sklearn.log_model(lr, "model")
몇가지 눈에 띄는 코드와 그 역할을 확인해보자.
mlflow.log_param: 포스트1 참조mlflow.log_metric: 포스트1 참조mlflow.sklearn.log_model: 모델을 저장
5. 프로젝트 실행 : mlflow run
( 콘다 옵션 사용 안하기 위해, --no-conda 옵션 지정)
하나 상위 경로로 올라 간뒤 (examples ), 아래의 코드를 실행한다
$ cd ..
$ mlflow run sklearn_elasticnet_wine -P alpha=0.5 --no-conda
/Users/seunghan96/opt/anaconda3/lib/python3.9/site-packages/click/core.py:2309: FutureWarning: `--no-conda` is deprecated and will be removed in a future MLflow release. Use `--env-manager=local` instead.
  value = self.callback(ctx, self, value)
2022/05/06 20:38:07 INFO mlflow.projects.utils: === Created directory /var/folders/ln/bxrzt06d0r3fbxsdkgxb_dc80000gn/T/tmp4p7foknu for downloading remote URIs passed to arguments of type 'path' ===
2022/05/06 20:38:07 INFO mlflow.projects.backend.local: === Running command 'python train.py 0.5 0.1' in run with ID '9a7496d349c7404988a9c195b19a0242' ===
Elasticnet model (alpha=0.500000, l1_ratio=0.100000):
  RMSE: 0.7460550348172179
  MAE: 0.576381895873763
  R2: 0.21136606570632266
2022/05/06 20:38:14 INFO mlflow.projects: === Run (ID '9a7496d349c7404988a9c195b19a0242') succeeded ===
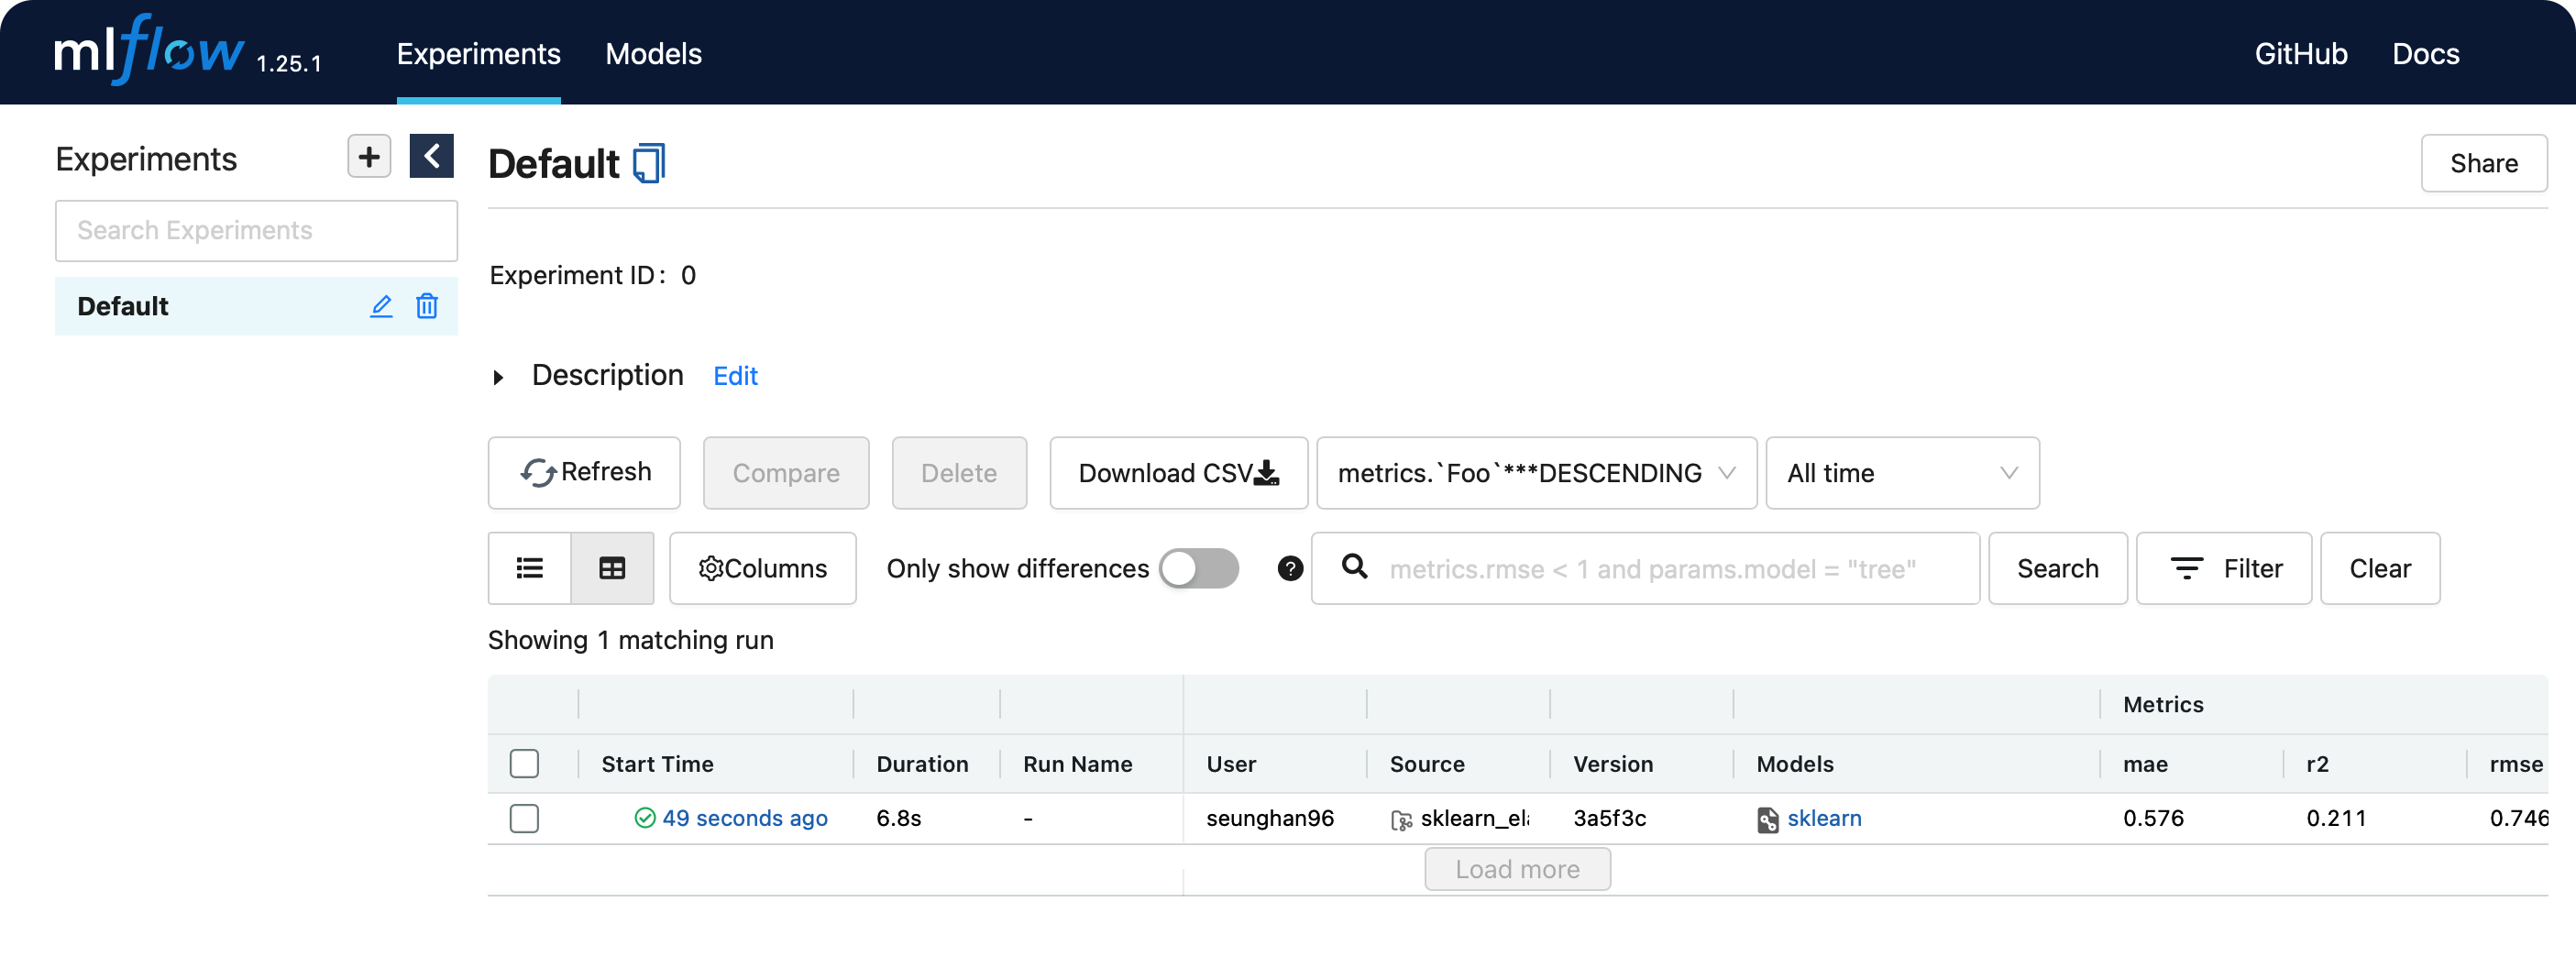
6. 결과물 확인

마찬가지로, mlruns 경로가 생성된 것을 확인할 수 있다.
7. 웹 대시보드
( 주의 : mlruns 경로에 들어가서 수행하면 안되고,방금 mlflow run을 수행했던 그 폴더, 즉 mlruns 폴더가 있는 경로에서 수행해야 한다. )
$ mlflow ui
[2022-05-06 20:45:56 +0900] [25724] [INFO] Starting gunicorn 20.1.0
[2022-05-06 20:45:56 +0900] [25724] [INFO] Listening at: http://127.0.0.1:5000 (25724)
[2022-05-06 20:45:56 +0900] [25724] [INFO] Using worker: sync
[2022-05-06 20:45:56 +0900] [25725] [INFO] Booting worker with pid: 25725
위의 http://127.0.0.1:5000 로 접속해보자.
방금 전에 실행한 run에 대한 결과가 웹 ui상으로 보기 쉽게 관리되는 것을 알 수 있다.
종료하고 싶다면, 위의 pid (process id)인 25724을 kill하면 된다
$ kill 25724
참고 : https://dailyheumsi.tistory.com