( reference : Machine Learning Data Lifecycle in Production )
Feature Engineering Pipeline
Goal : Feature Engineering Pipeline 짜기
Details
ExampleGen통해, base directory로부터 data ingest 하기StatisticsGen통해, training data의 statistics 계산하기SchemaGen통해, 스키마 infer하기ExampleValidator통해, evaluation 데이터에서 anomaly detect 하기Transform통해, model training에 적합한 형식으로 변환하기
Contents
- Import Packages & Define Paths
- ExampleGen
- StatisticsGen
- SchemaGen
- ExampleValidator
- Transform
1. Import Packages & Define Paths
import tensorflow as tf

from tfx.components import (CsvExampleGen, ExampleValidator, SchemaGen, StatisticsGen, Transform)
from tfx.orchestration.experimental.interactive.interactive_context import InteractiveContext
from google.protobuf.json_format import MessageToDict

import os
import pprint
pp = pprint.PrettyPrinter()
# Pipeline 경로
_pipeline_root = './pipeline/'

# Raw data 경로
_data_root = './data/census_data'

# Raw training data 경로
_data_filepath = os.path.join(_data_root, 'adult.data')
Interactive Context 만들기
- (나중에는) Apache Beam이나 Kubeflow 등으로 pipeline을 자동화 할 것.
- 하지만 여기서는 manually 할 것.
context = InteractiveContext(pipeline_root=_pipeline_root)
- 이
InteractiveContext를 통해,pipeline_root경로 하에 DB를 생성할 것- 이 DB에는, 여러 pipeline의 component들이 저장될 것이다.
2. ExampleGen
3줄 요약
- (1) 데이터 split ( train & eval )
- (2)
tf.train.Example형식으로 데이터 변환하기 - (3)
_pipeline_root에 나눠진 데이터들을 저장 ( 형식 :TFRecord)
_data_root 안에 있는 데이터는 csv 형식이므로, CsvExampleGen 을 사용
example_gen = CsvExampleGen(input_base=_data_root)
context.run(example_gen)
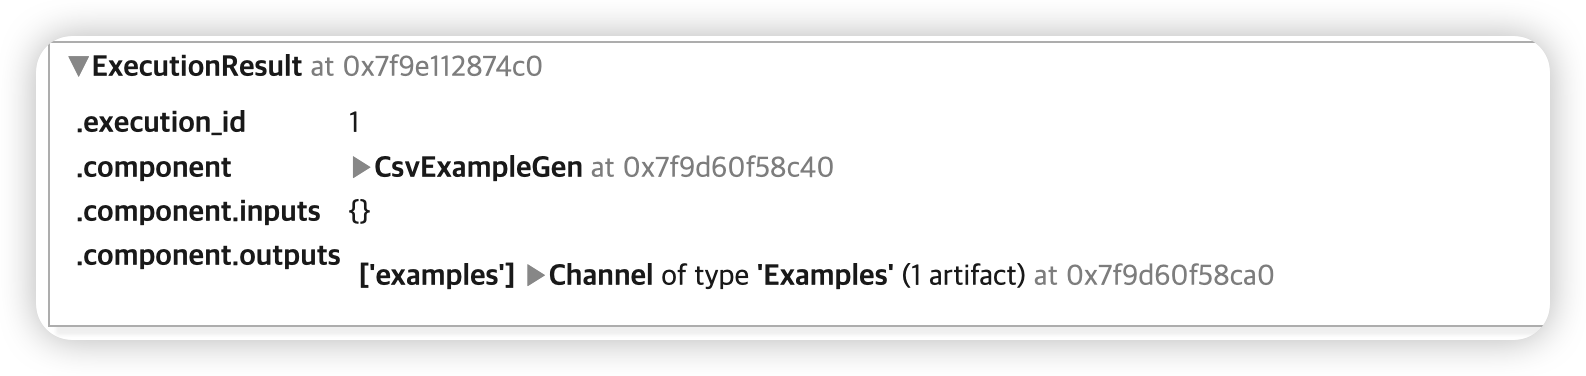
-
pipeline을 execute 한 기록이 뜬다
( 한번 더 실행하면,
.execution_id가 +1 )
이렇게 나온 component의 output을 우리는 artifact라고 부른다
artifact = example_gen.outputs['examples'].get()[0]

print(f'split names: {artifact.split_names}')
print(f'artifact uri: {artifact.uri}')
 split names: ["train", "eval"]
 artifact uri: ./pipeline/CsvExampleGen/examples/1
위의 URI 경로, 그 안의 “train” 폴더에 저장된 파일을 확인해보자.
train_uri = os.path.join(artifact.uri, 'train')

!ls {train_uri}
data_tfrecord-00000-of-00001.gz
해당 train_uri 안에서, 파일을 읽어 들인 뒤, TFRecordDataset 을 사용하여 데이터셋을 완성한다
tf.data.TFRecordDataset
tfrecord_filenames = [os.path.join(train_uri, name)
                      for name in os.listdir(train_uri)]

dataset = tf.data.TFRecordDataset(tfrecord_filenames, compression_type="GZIP")
해당 데이터셋으로부터, 지정한 개수 만큼의 데이터를 읽어오는 get_records() 함수를 구현한다.
def get_records(dataset, num_records):
    records = []

    for tfrecord in dataset.take(num_records):
        # (1) tf.train.Example() = 데이터 읽어들이기 위해
        example = tf.train.Example()

        # (2) np.array 로 변환 후, 읽어들이기
        tfrecord_np = tfrecord.numpy()

        # (3) protocol buffer message형식
        example.ParseFromString(tfrecord_np)

        # (4) protocol buffer message -> dictionary 변환
        example_dict = MessageToDict(example)
        records.append(example_dict)

    return records
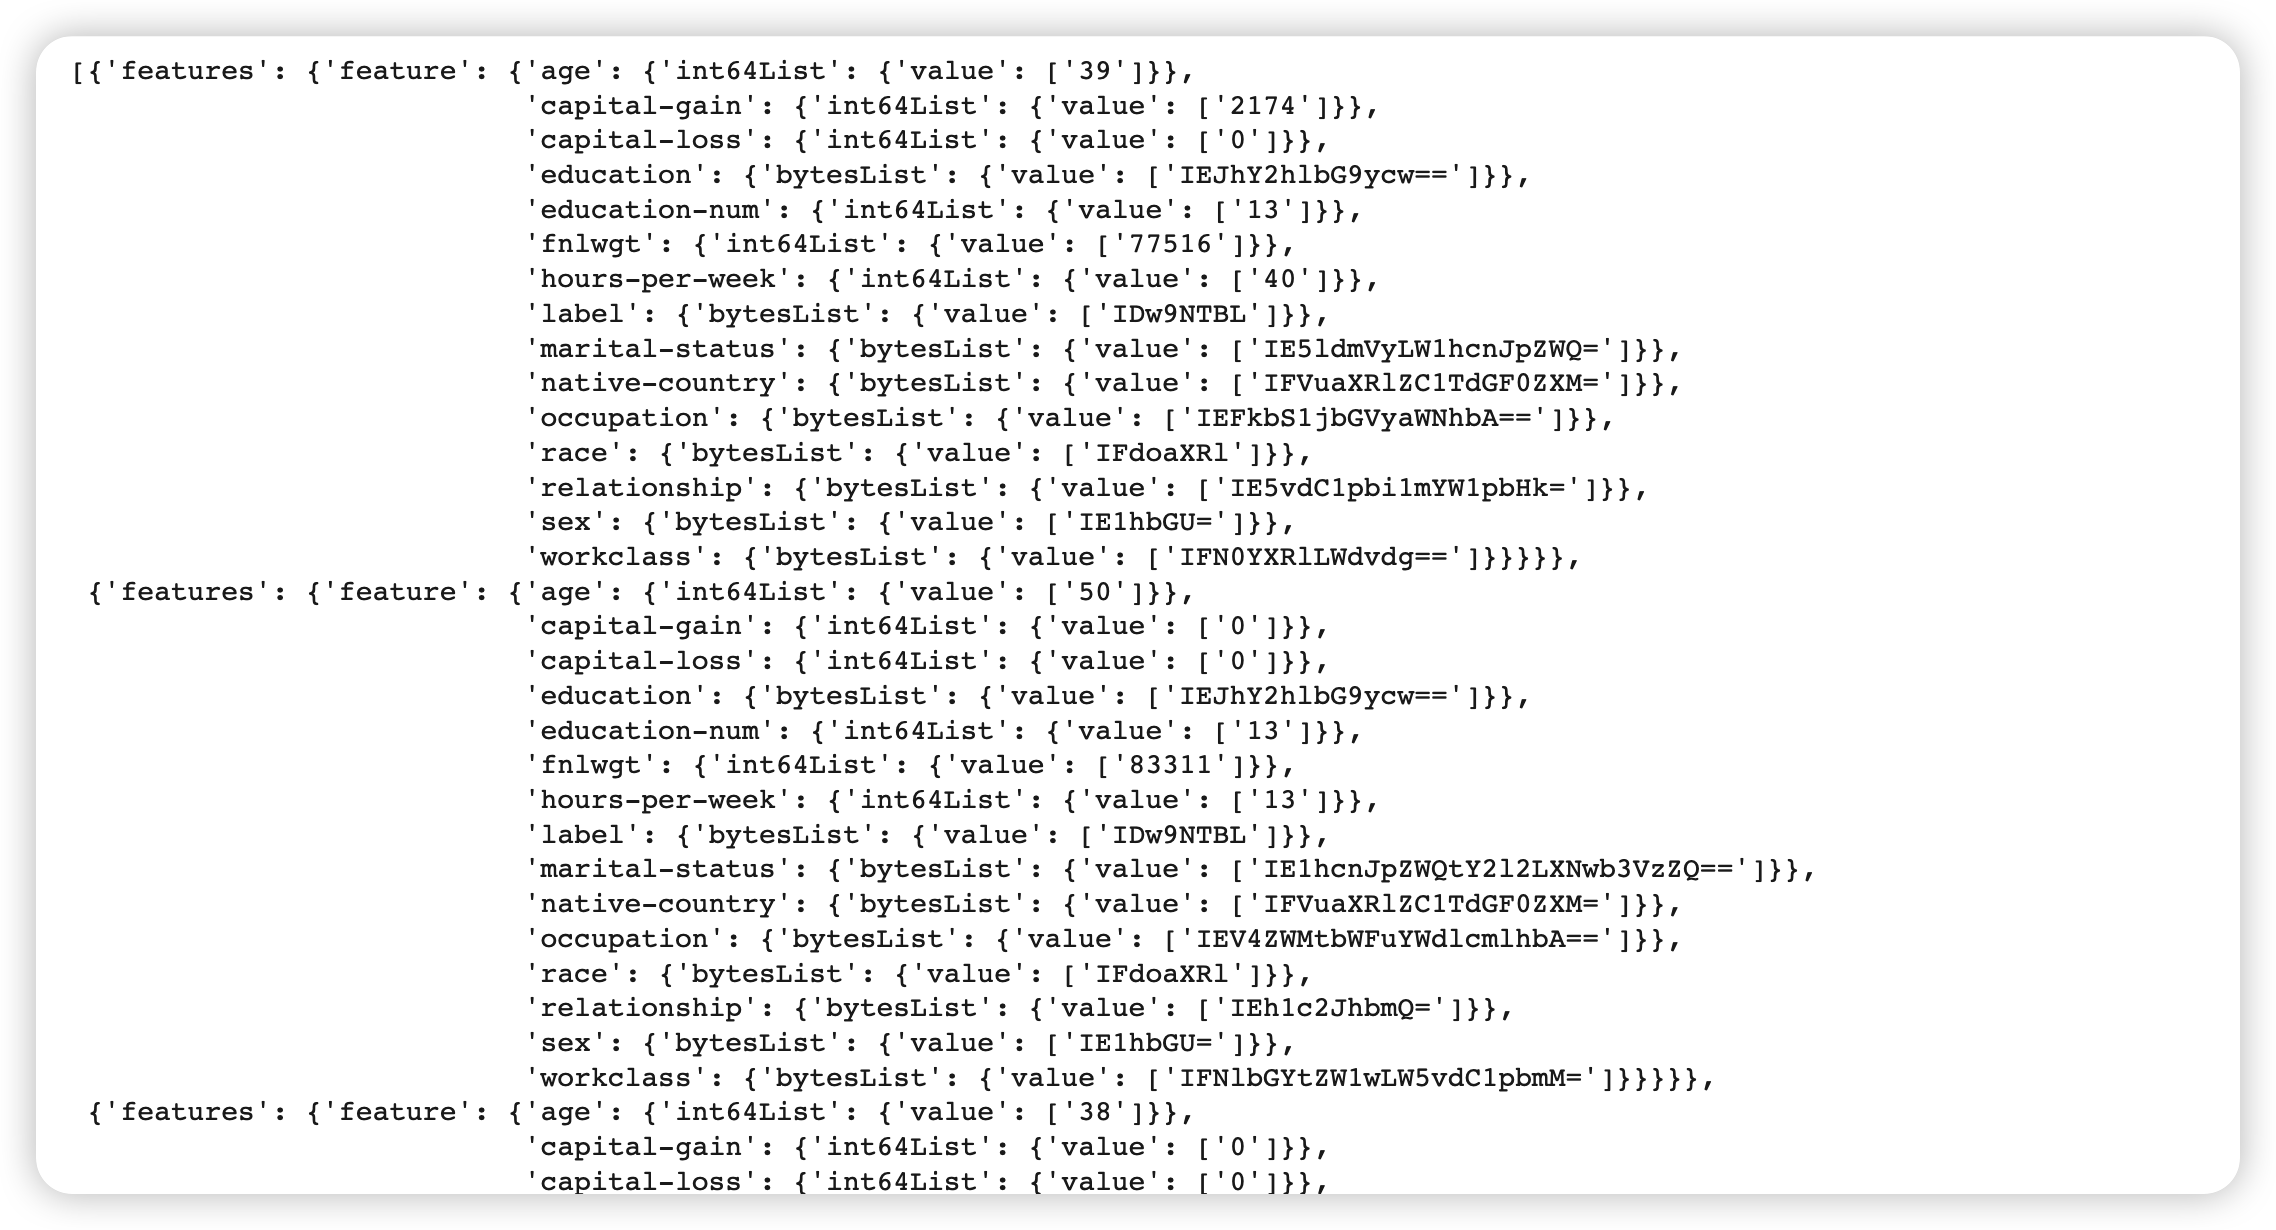
예시로, 3개의 데이터를 가져와본다.
sample_records = get_records(dataset, 3)
pp.pprint(sample_records)
3. StatisticsGen
데이터셋으로부터 통계량을 계산 ( TFDV 사용 )
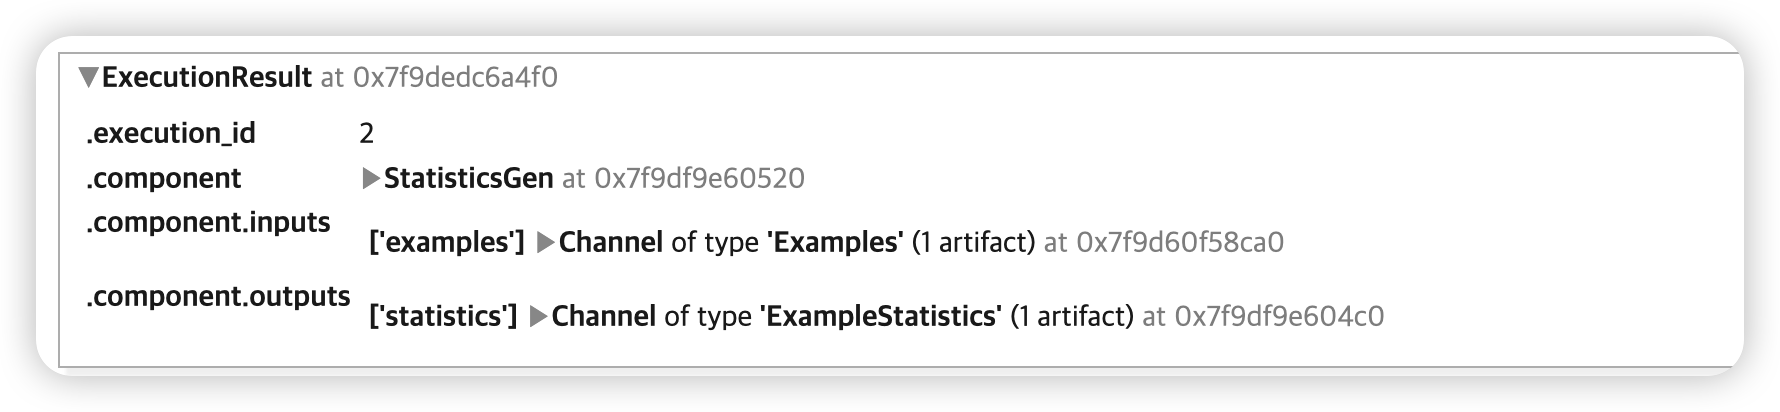
statistics_gen = StatisticsGen(
    examples=example_gen.outputs['examples'])

context.run(statistics_gen)
통계량 확인하기 ( both TRAIN & EVAL dataset )
context.show(statistics_gen.outputs['statistics'])

4. SchemaGen
statistics_gen 을사용하여, schema를 생성한다 ( TFDV 사용 )
schema_gen = SchemaGen(
    statistics=statistics_gen.outputs['statistics'])

context.run(schema_gen)

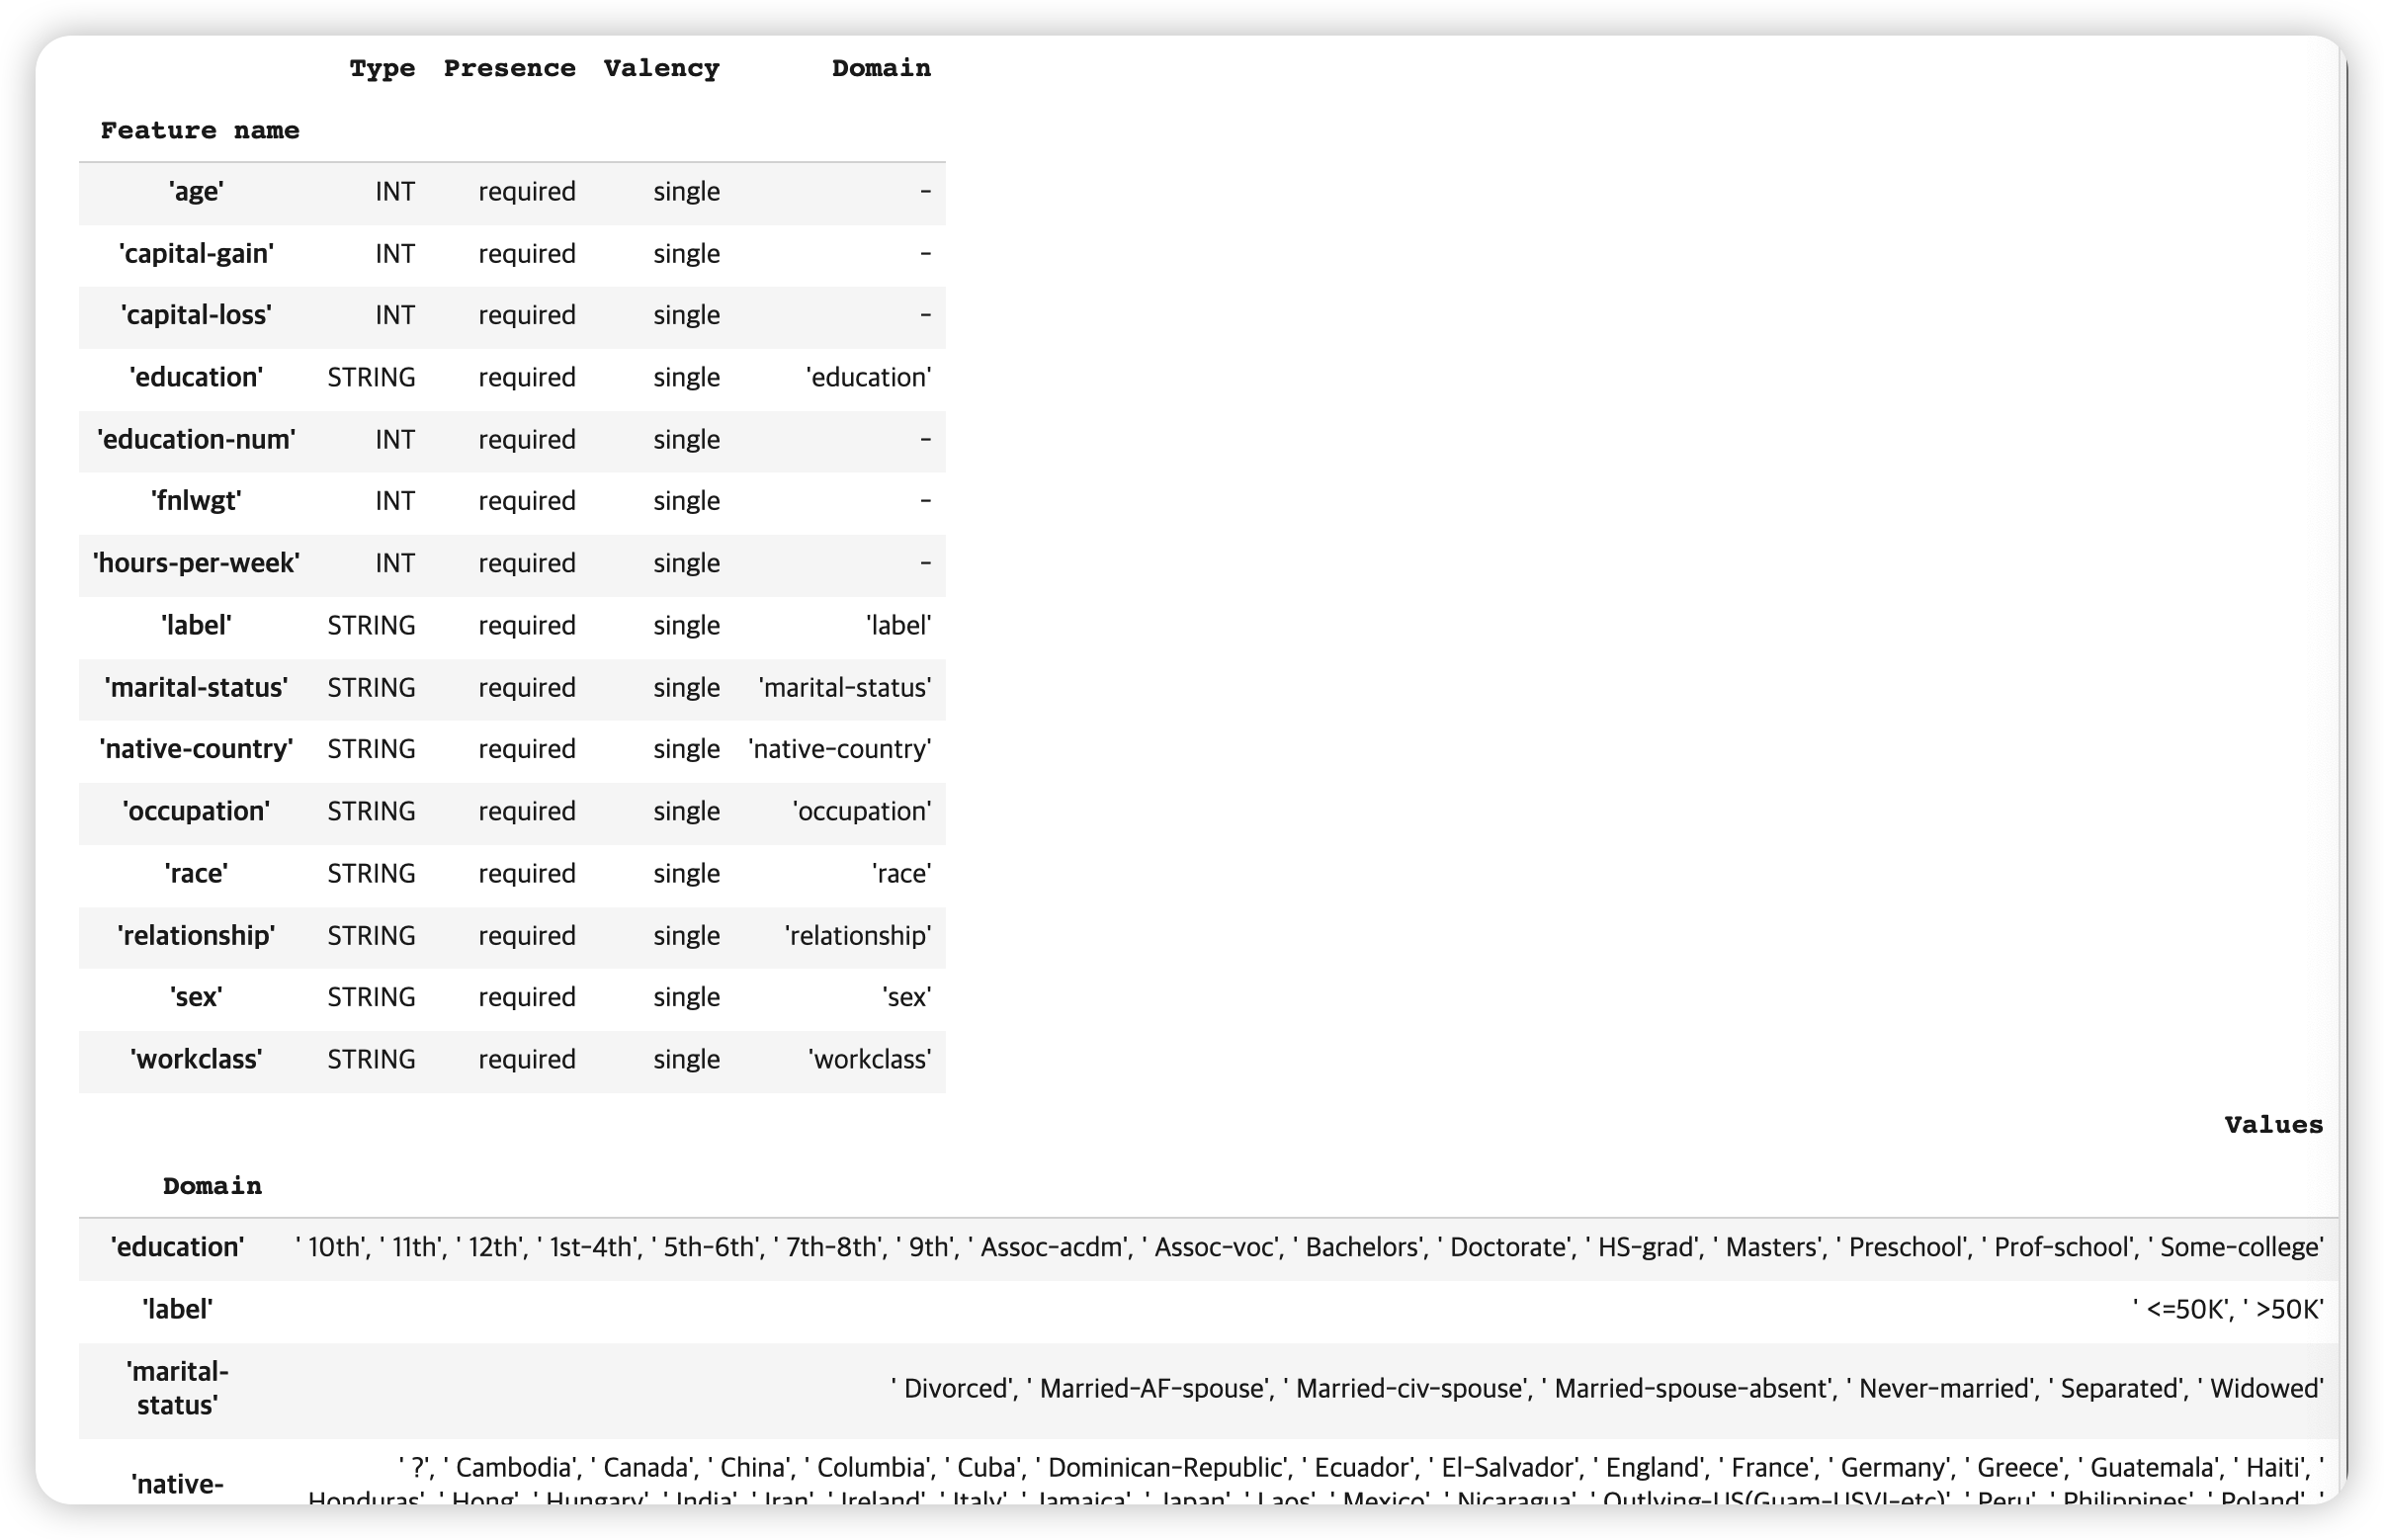
스키마를 자세히 들여다보면, 아래와 같다.
- 이 또한 pipeline내의 하나의 component의 아웃풋이므로, artifact 이다
context.show(schema_gen.outputs['schema'])
5. ExampleValidator
statistics_gen 과 schema_gen 을 사용하여, 이상치 여부를 탐색한다.
- 비교 대상 : training & evaluation dataset
example_validator = ExampleValidator(
    statistics=statistics_gen.outputs['statistics'],
    schema=schema_gen.outputs['schema'])

context.run(example_validator)
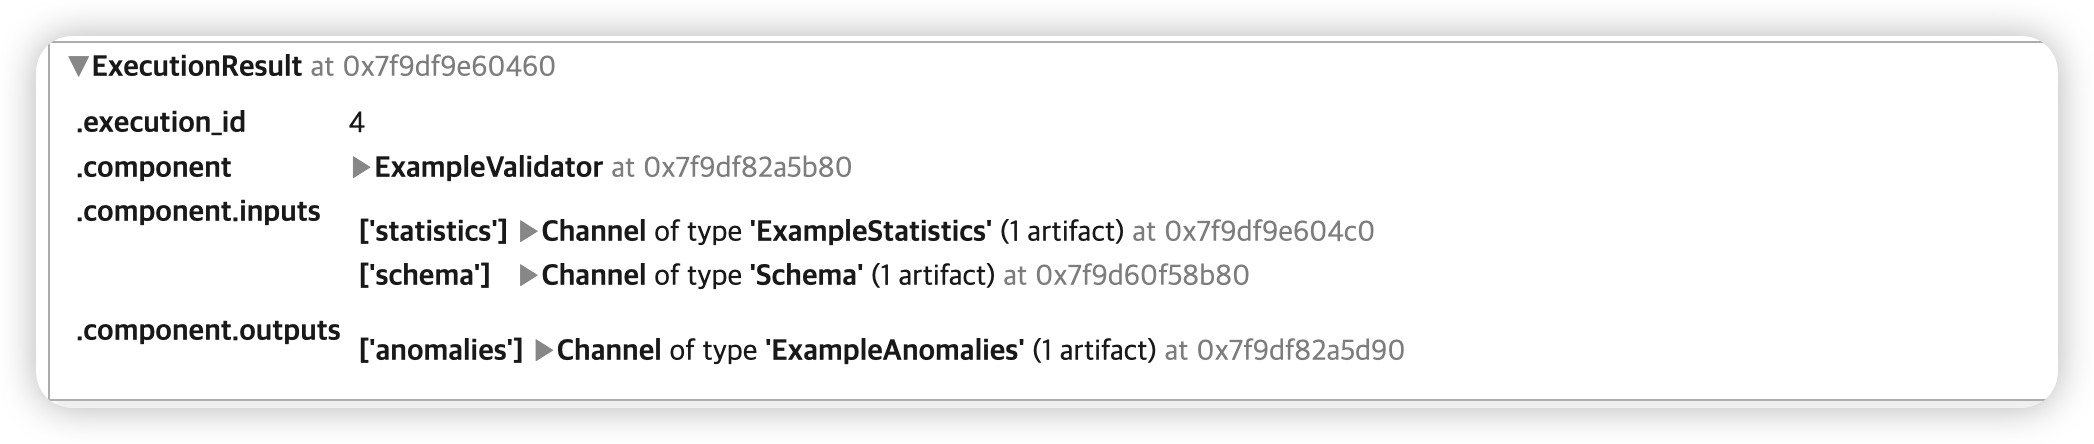
context.show(example_validator.outputs['anomalies'])
- 이상치 없음
6. Transform
3가지 구성 요소 :
example_gen,schema_gen, transform 함수
Transformation은 training & serving dataset에 모두 적용된다.
magic command %% writefile 을 사용하여, 전처리 함수 코드를 저장한다!
(1) constant module
_census_constants_module_file = 'census_constants.py'
%%writefile {_census_constants_module_file}

CATEGORICAL_FEATURE_KEYS = [
    'education', 'marital-status', 'occupation', 'race', 'relationship', 'workclass',
  'sex', 'native-country']

NUMERIC_FEATURE_KEYS = ['fnlwgt', 'education-num', 'capital-gain', 'capital-loss',
                        'hours-per-week']

BUCKET_FEATURE_KEYS = ['age']

FEATURE_BUCKET_COUNT = {'age': 4}

LABEL_KEY = 'label'

def transformed_name(key):
    return key + '_xf'
(2) 전처리 함수
_census_transform_module_file = 'census_transform.py'
%%writefile {_census_transform_module_file}

import tensorflow as tf
import tensorflow_transform as tft
import census_constants

# 위의 constants module을 불러와서 unpack 한다
_NUMERIC_FEATURE_KEYS = census_constants.NUMERIC_FEATURE_KEYS
_CATEGORICAL_FEATURE_KEYS = census_constants.CATEGORICAL_FEATURE_KEYS
_BUCKET_FEATURE_KEYS = census_constants.BUCKET_FEATURE_KEYS
_FEATURE_BUCKET_COUNT = census_constants.FEATURE_BUCKET_COUNT
_LABEL_KEY = census_constants.LABEL_KEY
_transformed_name = census_constants.transformed_name


# 전처리 함수를 정의한다
def preprocessing_fn(inputs):
    outputs = {}
    for key in _NUMERIC_FEATURE_KEYS:
        outputs[_transformed_name(key)] = tft.scale_to_0_1(
            inputs[key])
    for key in _BUCKET_FEATURE_KEYS:
        outputs[_transformed_name(key)] = tft.bucketize(
            inputs[key], _FEATURE_BUCKET_COUNT[key],
            always_return_num_quantiles=False)
    for key in _CATEGORICAL_FEATURE_KEYS:
        outputs[_transformed_name(key)] = tft.compute_and_apply_vocabulary(inputs[key])

    outputs[_transformed_name(_LABEL_KEY)] = tft.compute_and_apply_vocabulary(
      inputs[_LABEL_KEY])

    return outputs
(3) 전처리 시행
# warning 메시지 무시하기 위해
tf.get_logger().setLevel('ERROR')

# Transform component 생성하기
transform = Transform(
    examples=example_gen.outputs['examples'],
    schema=schema_gen.outputs['schema'],
    module_file=os.path.abspath(_census_transform_module_file))

context.run(transform)
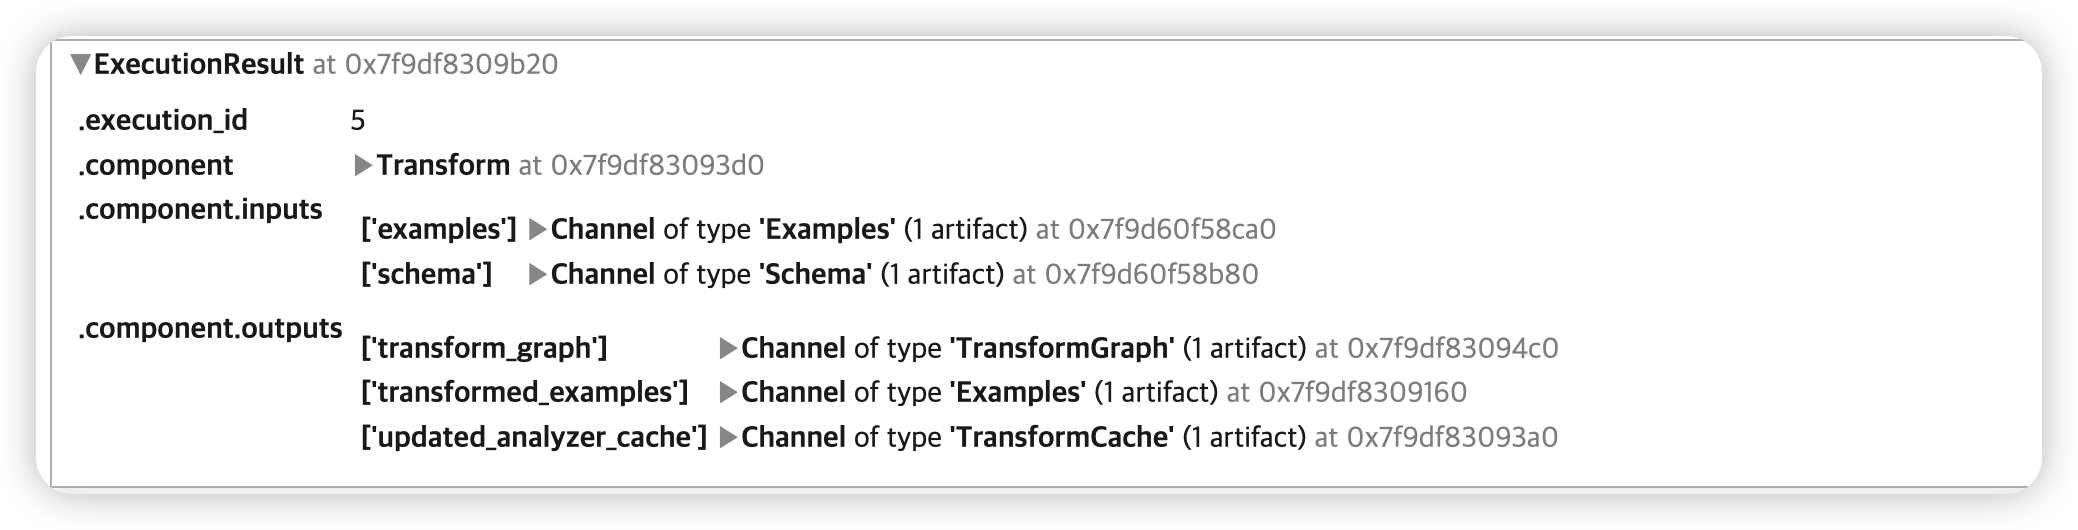
위의 전처리 결과로 나오는 3가지 artifact
- (1)
transform_graph: 전처리 과정 그래프 - (2)
transformed_examples: 전처리된 결과 ( train & eval dataset ) - (3)
updated_analyzer_cache
그 중, (1) tranform_graph 아티팩트를 가져와서 면밀히 살펴보자
transform_graph_uri = transform.outputs['transform_graph'].get()[0].uri

os.listdir(transform_graph_uri)
['metadata', 'transformed_metadata', 'transform_fn']
- 1-1) metadata : 기존 데이터의 schema
- 1-2) transformed_metadata : 변환된 데이터의 schema
- 1-3) transform_fn : preprocessing graph
이번엔, (2) transformed_examples 아티팩트를 가져와서 면밀히 살펴보자
train_uri = os.path.join(transform.outputs['transformed_examples'].get()[0].uri, 'train')

tfrecord_filenames = [os.path.join(train_uri, name)
                      for name in os.listdir(train_uri)]

# TFRecordDataset 생성
transformed_dataset = tf.data.TFRecordDataset(tfrecord_filenames,
                                              compression_type="GZIP")
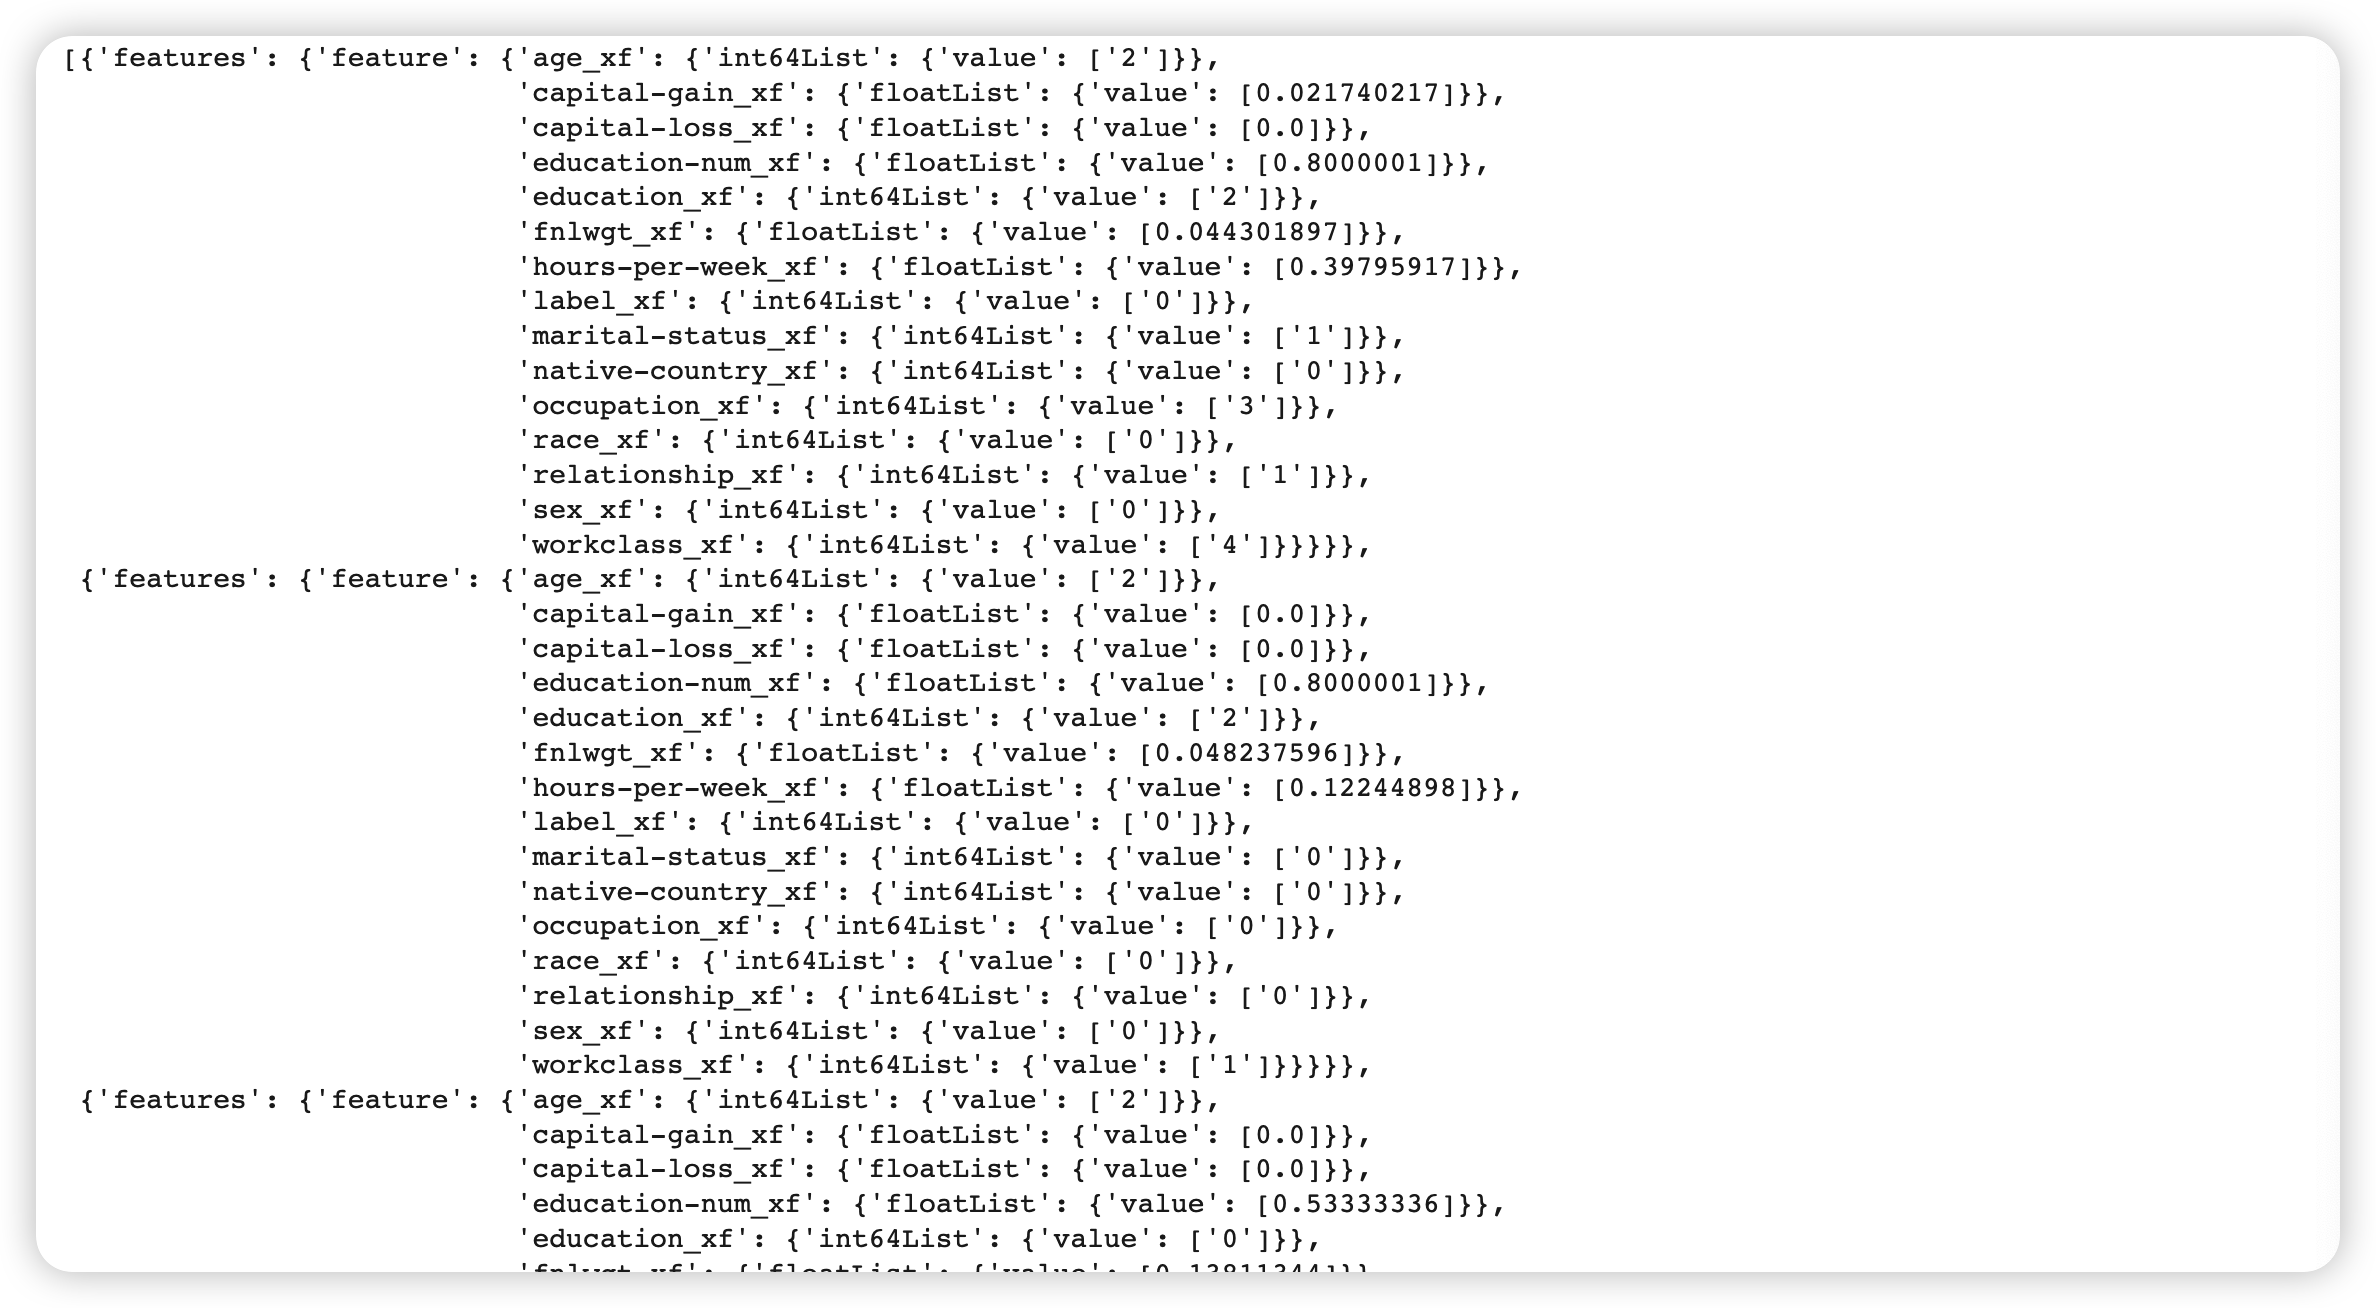
( 3개의 데이터를 확인해보자 )
sample_records_xf = get_records(transformed_dataset, 3)
pp.pprint(sample_records_xf)