
Mlflow 4. Automatic Logging
Contents
- 경로 이동
- 구조 확인하기
- 예제 1
- 예제 2
- 예제 3
이번엔, 모델을 서빙해볼 것이다.
즉, ML 모델을 학습시키고, 이 weight값을 잘 저장한 다음에, 쉽게 inference에 사용할 수 있도록 만들 것이다.
1. 경로 이동
$ cd mlflow/examples
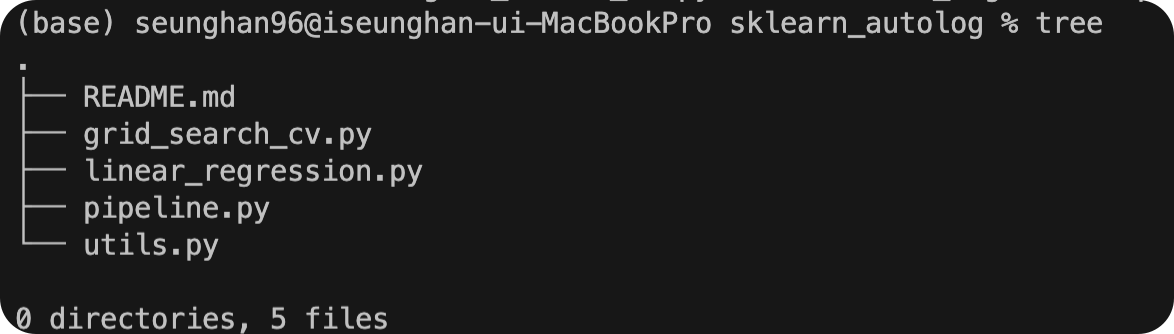
이번에 실습할 예제는 sklearn_autolog이다.
2. 구조 확인하기
3. 예제 1
(1) linear_regression.py 실행
선형회귀를 수행하는 단순한 코드이다.
# skelarn_autolog/linear_regression.py

from pprint import pprint

import numpy as np
from sklearn.linear_model import LinearRegression

import mlflow
from utils import fetch_logged_data


def main():
    # enable autologging
    mlflow.sklearn.autolog()

    # prepare training data
    X = np.array([[1, 1], [1, 2], [2, 2], [2, 3]])
    y = np.dot(X, np.array([1, 2])) + 3

    # train a model
    model = LinearRegression()
    with mlflow.start_run() as run:
        model.fit(X, y)
        print("Logged data and model in run {}".format(run.info.run_id))

    # show logged data
    for key, data in fetch_logged_data(run.info.run_id).items():
        print("\n---------- logged {} - ---------".format(key))
        pprint(data)


if __name__ == "__main__":
    main()
이 안에 있는 두 가지 핵심 코드를 살펴보자.
-
(1)
mlflow.sklearn.autolog(): 코드 맨 앞에 넣으며, automatic logging 기능을 사용하는 설정 코드이다 -
(2)
with mlflow.start_run() as run:: run(실행)의 시작을 알리는 context manager이다.
위 코드를 실행해보자.
$ python sklearn_autolog/linear_regression.py
2022/05/06 21:11:35 INFO mlflow.utils.autologging_utils: Created MLflow autologging run with ID 'f02d31d487a14109aec45ee0a5dafb90', which will track hyperparameters, performance metrics, model artifacts, and lineage information for the current sklearn workflow
Logged data and model in run f02d31d487a14109aec45ee0a5dafb90

---------- logged params ----------
{'copy_X': 'True',
 'fit_intercept': 'True',
 'n_jobs': 'None',
 'normalize': 'False',
 'positive': 'False'}

---------- logged metrics ----------
{'training_mae': 2.220446049250313e-16,
 'training_mse': 1.9721522630525295e-31,
 'training_r2_score': 1.0,
 'training_rmse': 4.440892098500626e-16,
 'training_score': 1.0}

---------- logged tags ----------
{'estimator_class': 'sklearn.linear_model._base.LinearRegression',
 'estimator_name': 'LinearRegression'}

---------- logged artifacts ----------
['model/MLmodel',
 'model/conda.yaml',
 'model/model.pkl',
 'model/requirements.txt']
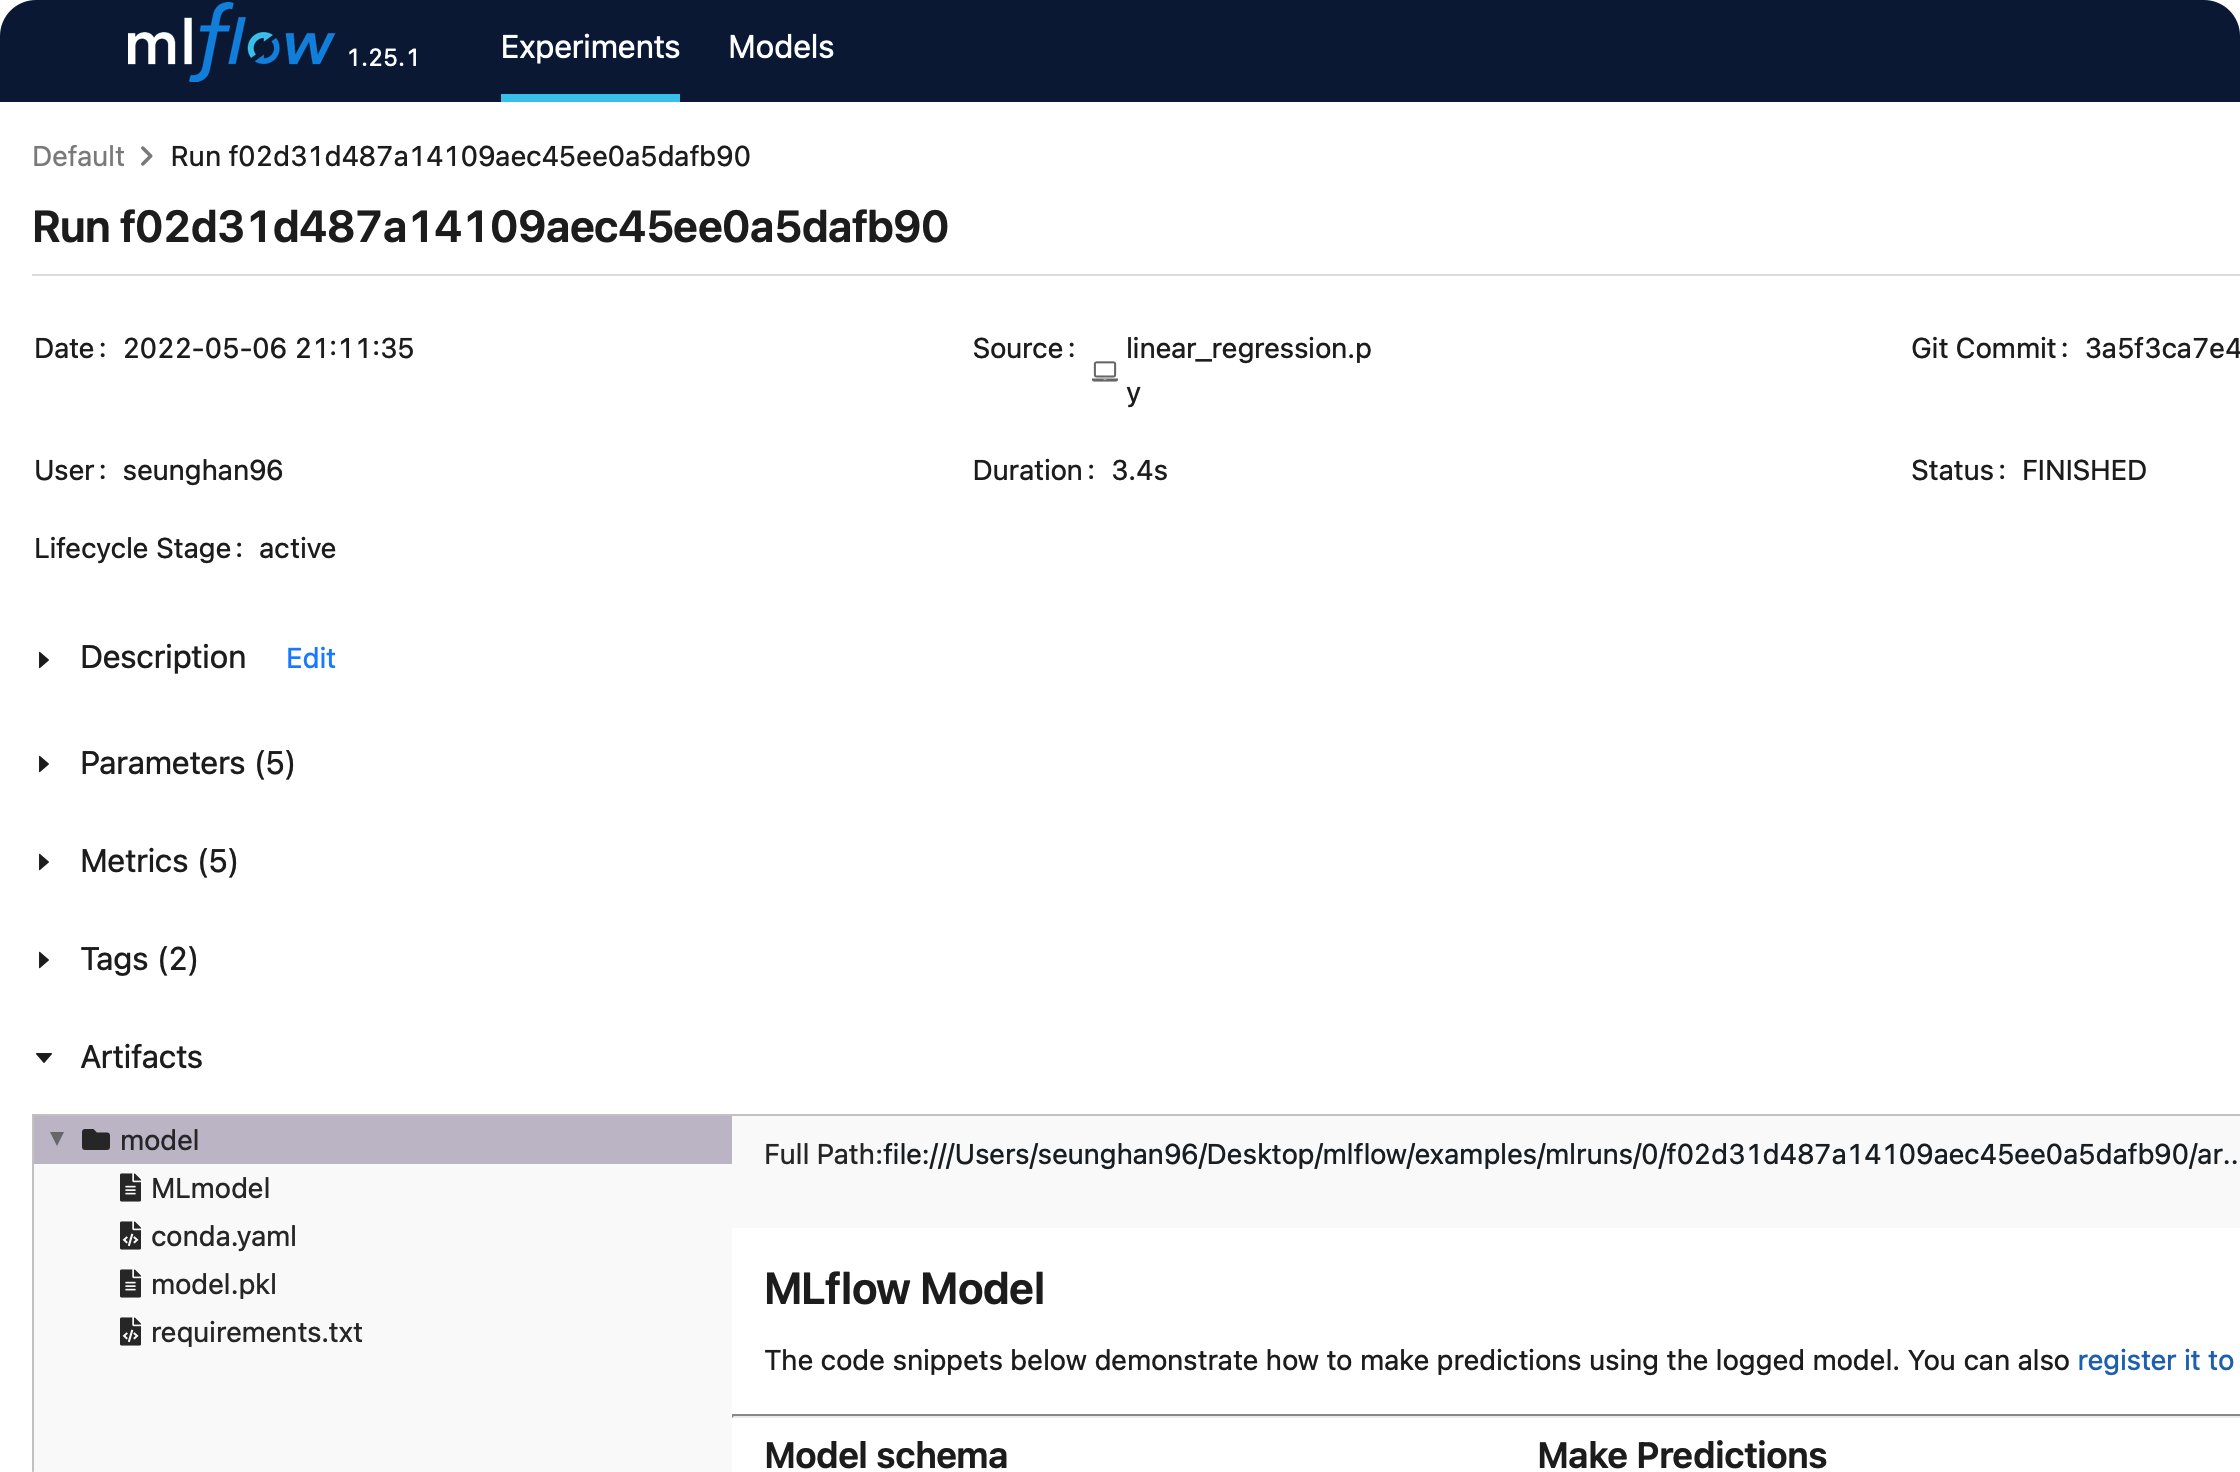
(2) 실행 결과 해석
run_id:f02d31d487a14109aec45ee0a5dafb90logged params: 모델의 파라미터 ( weight가 아니라, __init__ 파라미터를 의미한다 ) 저장logged metrics: 모델 평가 metric을 저장logged tags: 실행 관련 tag ( 기본적으로 모델의 package & class명을 기록 )를 저장logged artifacts: 실행 관련 아티팩트들을 저장
(3) 웹 대시보드
$ mlflow ui
[2022-05-06 21:15:44 +0900] [26193] [INFO] Starting gunicorn 20.1.0
[2022-05-06 21:15:44 +0900] [26193] [INFO] Listening at: http://127.0.0.1:5000 (26193)
[2022-05-06 21:15:44 +0900] [26193] [INFO] Using worker: sync
[2022-05-06 21:15:44 +0900] [26194] [INFO] Booting worker with pid: 26194
위의 http://127.0.0.1:5000 로 접속해보자.
방금 전에 실행한 run에 대한 결과가 웹 ui상으로 보기 쉽게 관리되는 것을 알 수 있다.
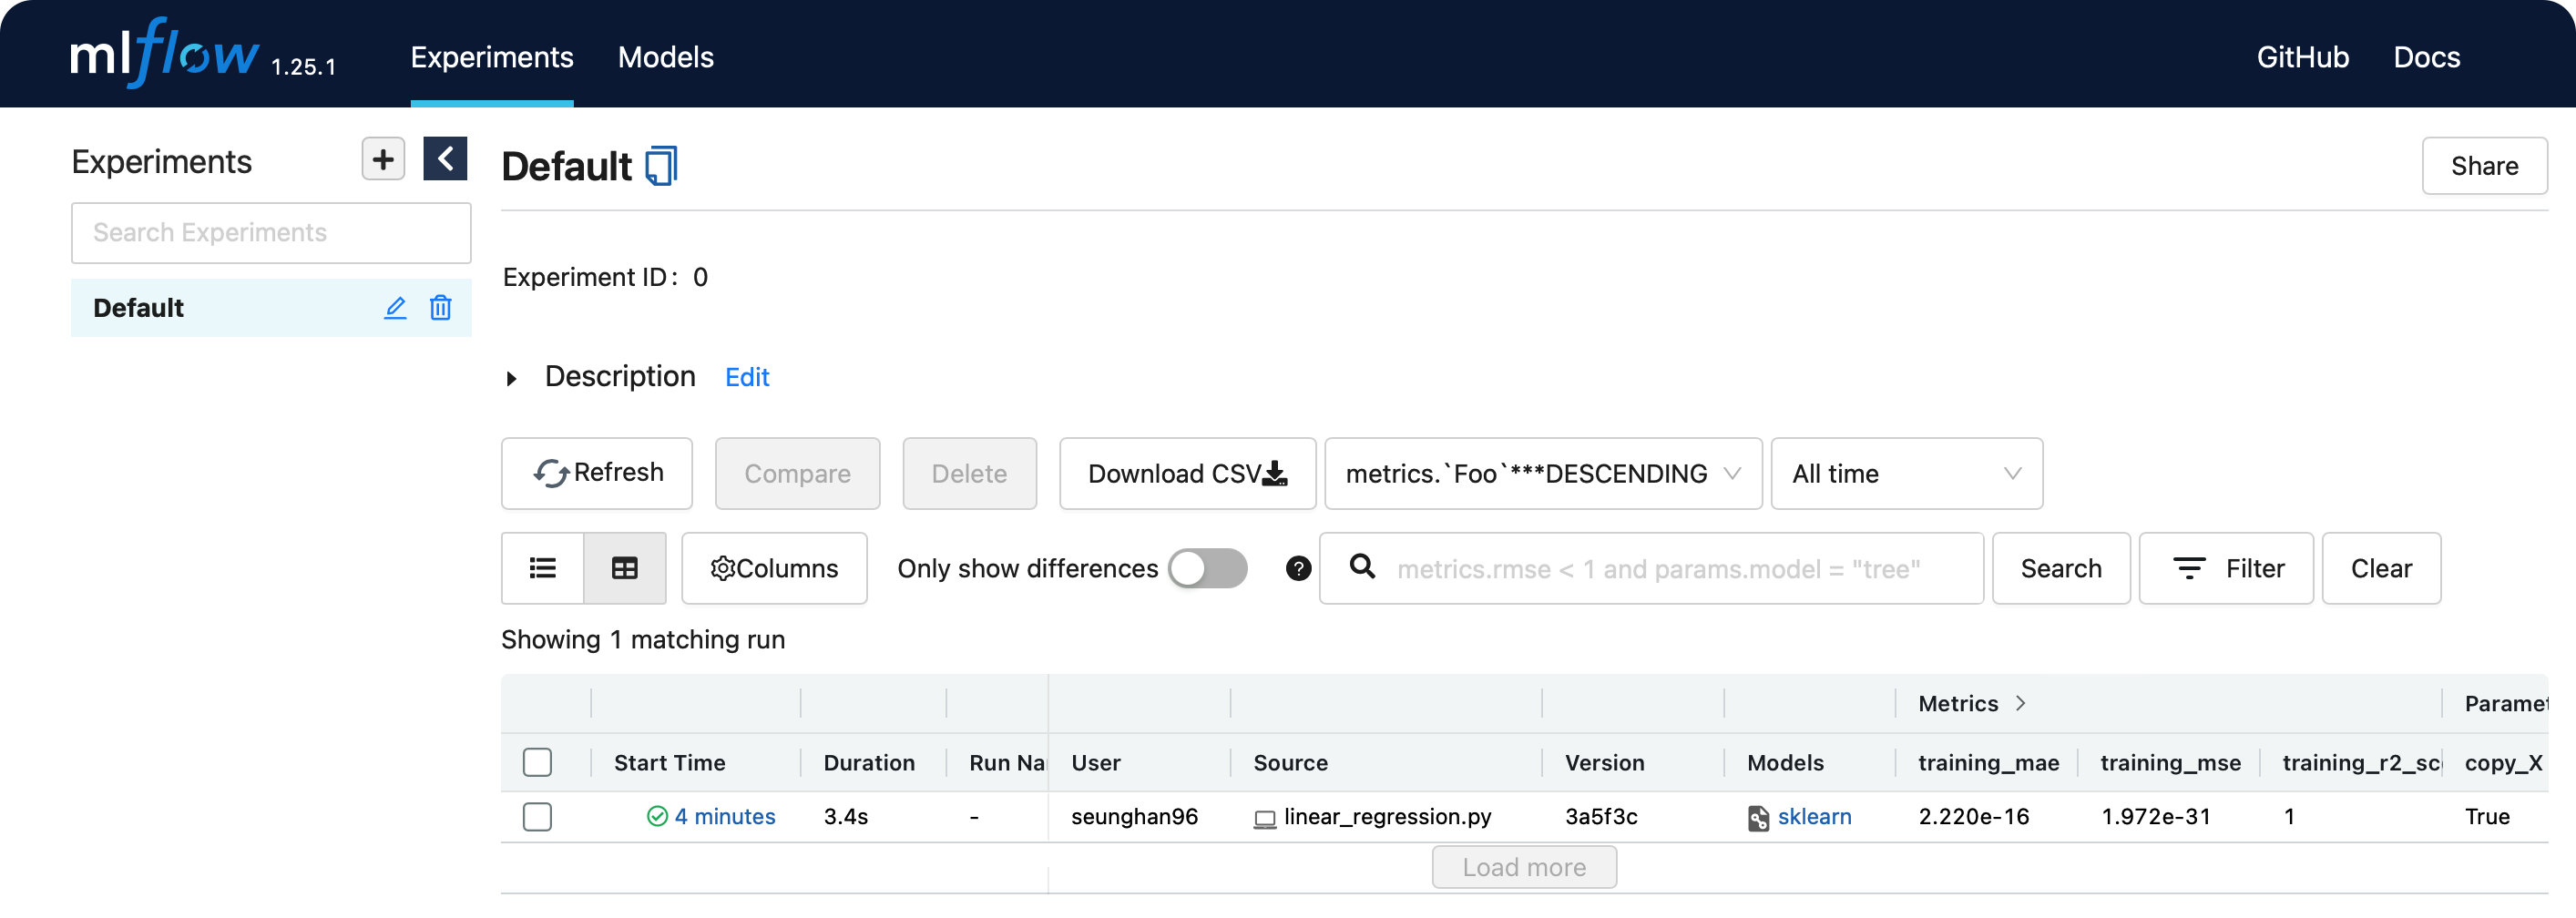
위의 models 칼럼 아래에 있는 sklearn을 클릭하면,
params,metrics,tags등에 대해 보다 자세히 확인할 수 있다.
4. 예제 2
(1) pipeline.py 실행
from pprint import pprint

import numpy as np
from sklearn.linear_model import LinearRegression
from sklearn.preprocessing import StandardScaler
from sklearn.pipeline import Pipeline

import mlflow
from utils import fetch_logged_data


def main():
    # enable autologging
    mlflow.sklearn.autolog()

    # prepare training data
    X = np.array([[1, 1], [1, 2], [2, 2], [2, 3]])
    y = np.dot(X, np.array([1, 2])) + 3

    # train a model
    pipe = Pipeline([("scaler", StandardScaler()), ("lr", LinearRegression())])
    with mlflow.start_run() as run:
        pipe.fit(X, y)
        print("Logged data and model in run: {}".format(run.info.run_id))

    # show logged data
    for key, data in fetch_logged_data(run.info.run_id).items():
        print("\n---------- logged {} ----------".format(key))
        pprint(data)


if __name__ == "__main__":
    main()
위 코드를 실행해보자
$ python sklearn_autolog/pipeline.py
2022/05/06 21:22:48 INFO mlflow.utils.autologging_utils: Created MLflow autologging run with ID '0c0209831916416abc9e2fa27181282c', which will track hyperparameters, performance metrics, model artifacts, and lineage information for the current sklearn workflow
Logged data and model in run: 0c0209831916416abc9e2fa27181282c

---------- logged params ----------
{'lr': 'LinearRegression()',
 'lr__copy_X': 'True',
 'lr__fit_intercept': 'True',
 'lr__n_jobs': 'None',
 'lr__normalize': 'False',
 'lr__positive': 'False',
 'memory': 'None',
 'scaler': 'StandardScaler()',
 'scaler__copy': 'True',
 'scaler__with_mean': 'True',
 'scaler__with_std': 'True',
 'steps': "[('scaler', StandardScaler()), ('lr', LinearRegression())]",
 'verbose': 'False'}

---------- logged metrics ----------
{'training_mae': 2.220446049250313e-16,
 'training_mse': 1.9721522630525295e-31,
 'training_r2_score': 1.0,
 'training_rmse': 4.440892098500626e-16,
 'training_score': 1.0}

---------- logged tags ----------
{'estimator_class': 'sklearn.pipeline.Pipeline', 'estimator_name': 'Pipeline'}

---------- logged artifacts ----------
['model/MLmodel',
 'model/conda.yaml',
 'model/model.pkl',
 'model/requirements.txt']
마찬가지로, 위의 값들 모두 mlruns 에 저장된다.
위에서 눈 여겨볼 점은, 위의 logged_params에는,
- pipeline의 첫 번째인 : standard scaler 관련 파라미터와
- pipeline의 두 번째인 : linear regression 관련 파라미터
가 모두 담겨있다는 점이다.
5. 예제 3
(1) grid_search_cv.py 실행
from pprint import pprint

import pandas as pd
from sklearn import svm, datasets
from sklearn.model_selection import GridSearchCV

import mlflow
from utils import fetch_logged_data


def main():
    mlflow.sklearn.autolog()

    iris = datasets.load_iris()
    parameters = {"kernel": ("linear", "rbf"), "C": [1, 10]}
    svc = svm.SVC()
    clf = GridSearchCV(svc, parameters)

    with mlflow.start_run() as run:
        clf.fit(iris.data, iris.target)

    # show data logged in the parent run
    print("========== parent run ==========")
    for key, data in fetch_logged_data(run.info.run_id).items():
        print("\n---------- logged {} ----------".format(key))
        pprint(data)

    # show data logged in the child runs
    filter_child_runs = "tags.mlflow.parentRunId = '{}'".format(run.info.run_id)
    runs = mlflow.search_runs(filter_string=filter_child_runs)
    param_cols = ["params.{}".format(p) for p in parameters.keys()]
    metric_cols = ["metrics.mean_test_score"]

    print("\n========== child runs ==========\n")
    pd.set_option("display.max_columns", None)  # prevent truncating columns
    print(runs[["run_id", *param_cols, *metric_cols]])


if __name__ == "__main__":
    main()
간단 요약
- support vector machine (SVM)을 사용하여 모델 학습
- grid search로 하이퍼파라미터 서치 수행
위 코드를 실행해보자.
$ python sklearn_autolog/grid_search_cv.py
2022/05/06 21:30:48 INFO mlflow.utils.autologging_utils: Created MLflow autologging run with ID 'ef6615b16bf244c48664ab4832669cc0', which will track hyperparameters, performance metrics, model artifacts, and lineage information for the current sklearn workflow
2022/05/06 21:30:55 INFO mlflow.sklearn.utils: Logging the 5 best runs, no runs will be omitted.
========== parent run ==========

---------- logged params ----------
{'best_C': '1',
 'best_kernel': 'linear',
 'cv': 'None',
 'error_score': 'nan',
 'estimator': 'SVC()',
 'n_jobs': 'None',
 'param_grid': "{'kernel': ('linear', 'rbf'), 'C': [1, 10]}",
 'pre_dispatch': '2*n_jobs',
 'refit': 'True',
 'return_train_score': 'False',
 'scoring': 'None',
 'verbose': '0'}

---------- logged metrics ----------
{'best_cv_score': 0.9800000000000001,
 'training_accuracy_score': 0.9933333333333333,
 'training_f1_score': 0.9933326665999933,
 'training_precision_score': 0.9934640522875816,
 'training_recall_score': 0.9933333333333333,
 'training_score': 0.9933333333333333}

---------- logged tags ----------
{'estimator_class': 'sklearn.model_selection._search.GridSearchCV',
 'estimator_name': 'GridSearchCV'}

---------- logged artifacts ----------
['best_estimator/MLmodel',
 'best_estimator/conda.yaml',
 'best_estimator/model.pkl',
 'best_estimator/requirements.txt',
 'cv_results.csv',
 'model/MLmodel',
 'model/conda.yaml',
 'model/model.pkl',
 'model/requirements.txt',
 'training_confusion_matrix.png']

========== child runs ==========

                             run_id params.kernel params.C  \
0  17cae1ca86e14ed6abec0faa7e90792a        linear       10
1  2bc4c7b045d14460a897129652645dbf           rbf       10
2  694f0eb0f3964c1e92be465ea105f18f        linear        1
3  97ec74a3dae44ca1a0fdd62e8ae11bba           rbf        1

   metrics.mean_test_score
0                 0.973333
1                 0.980000
2                 0.980000
3                 0.966667
- 실행 결과 해석
앞선 두 예시와 다르게, 주목할 점이 있다. 바로,
- (1)
parent run - (2)
child runs
로 구성된다는 점이다.
parent run
- 전체 파이프라인에 들어간 파라미터 값들을 기록
GridSearch를 통해 찾은 최적의 파라미터 값을 기록 (best_C,best_kernel)
child_runs
- 각각의 gridsearch의 경우가 하나 하나의
run이 된다. ( 그만큼 많은run_id를 가진다 )
(2) 웹 대시보드
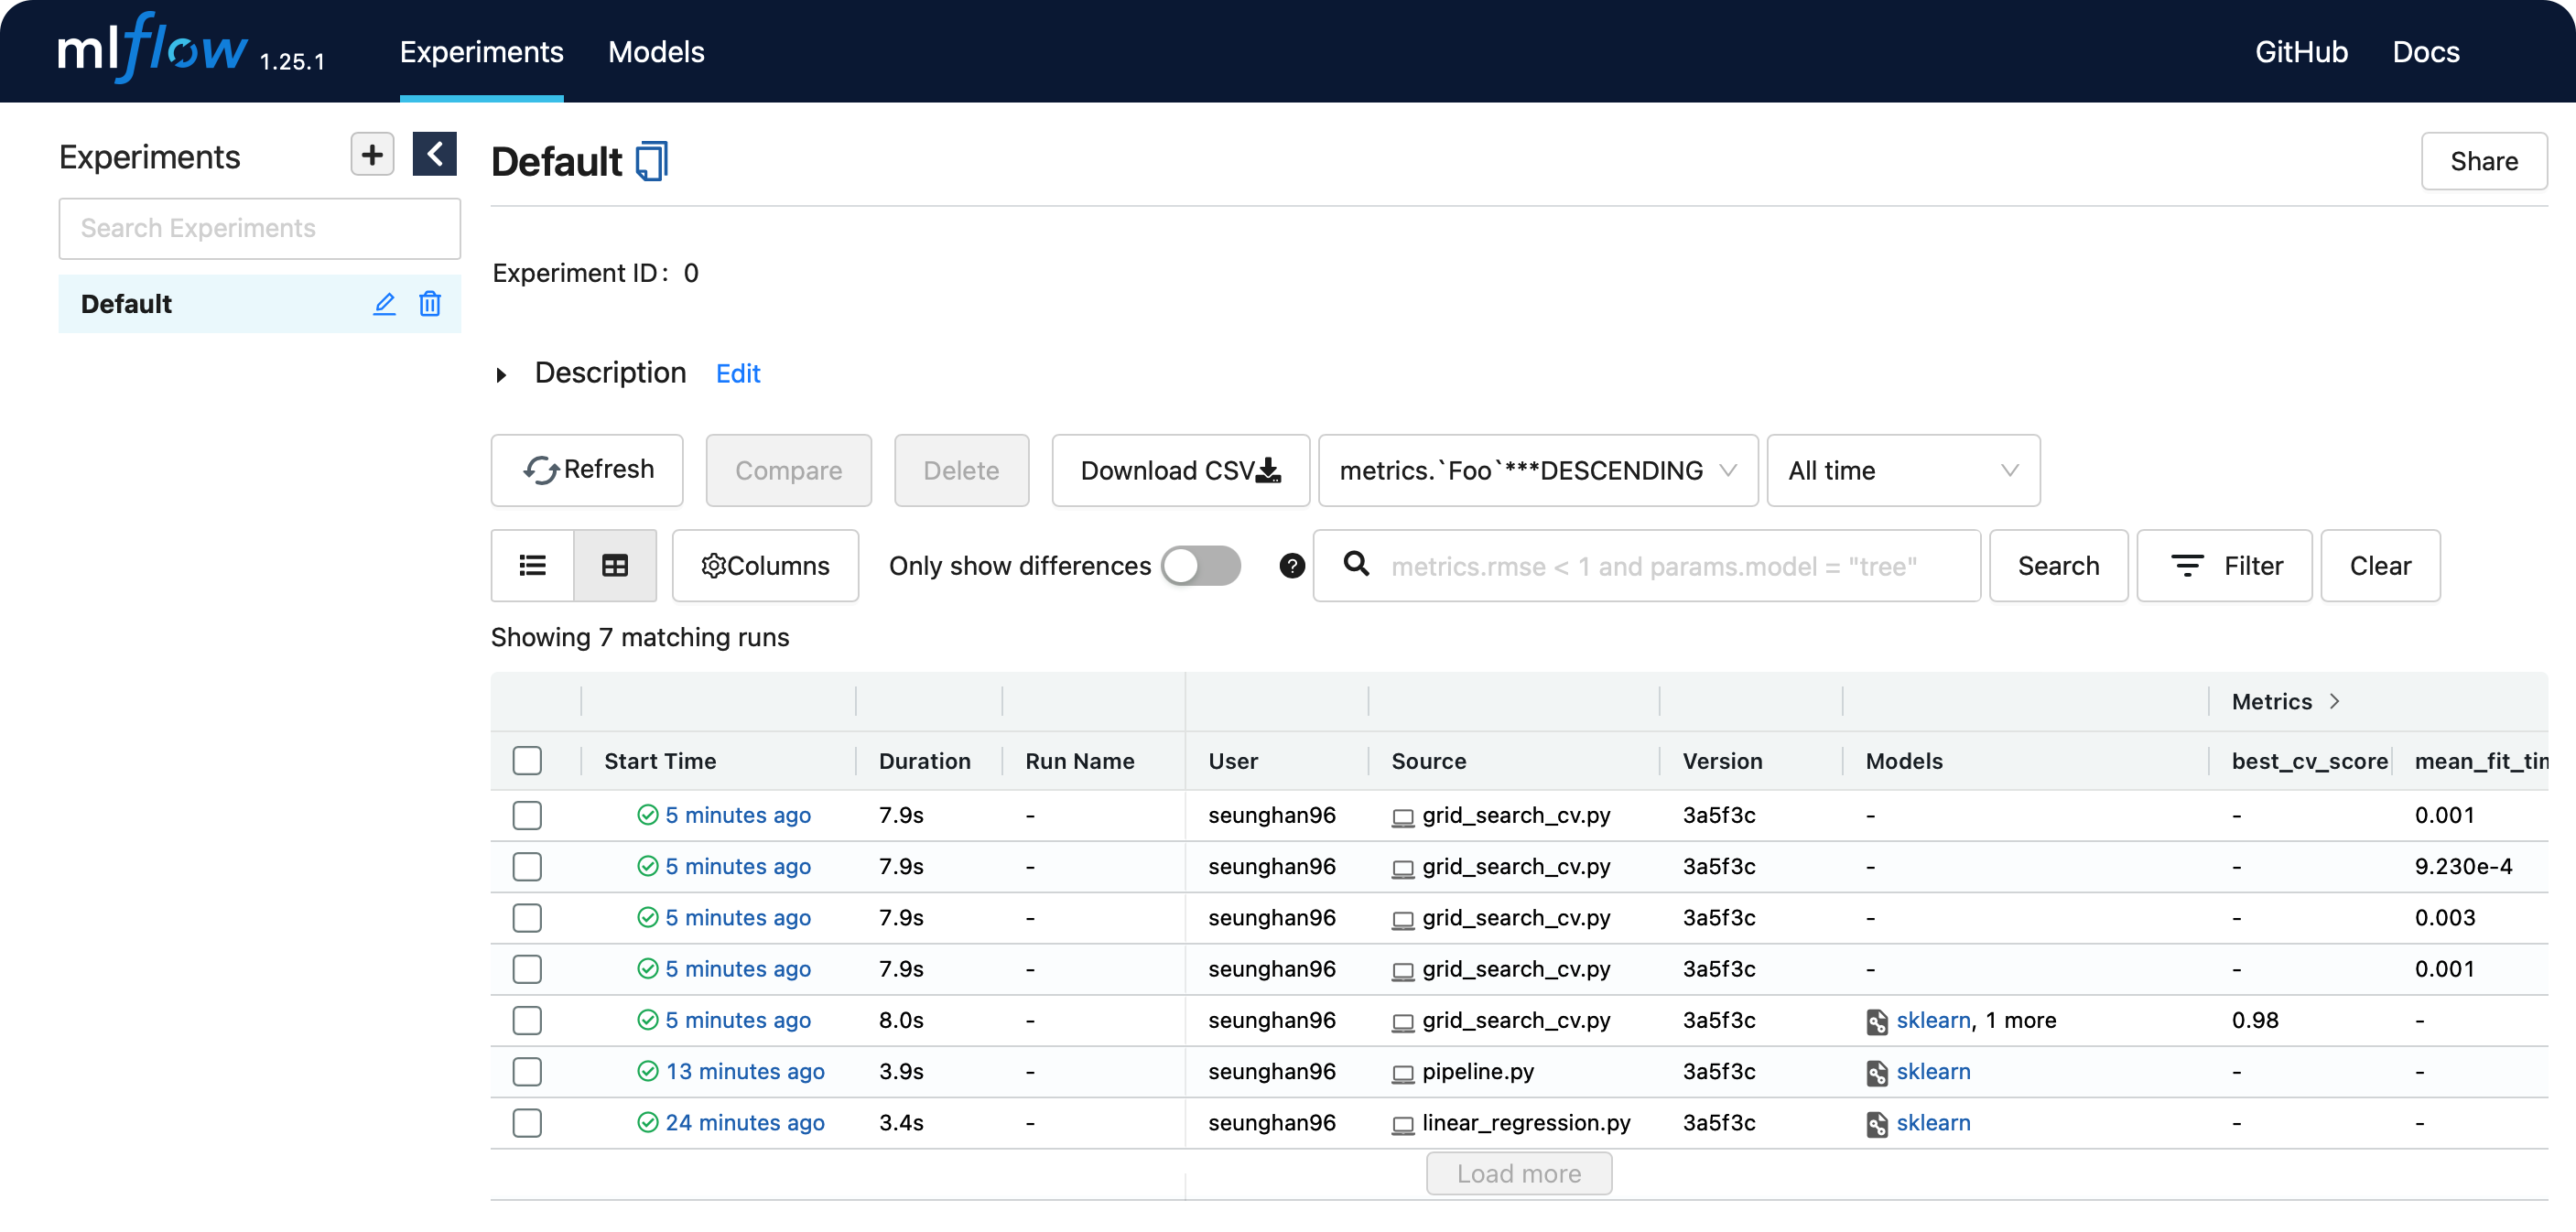
- 앞서 말한바와 같이, grid search로 인해 여러 개의 run이 기록된 것을 알 수 있다.
참고 : https://dailyheumsi.tistory.com